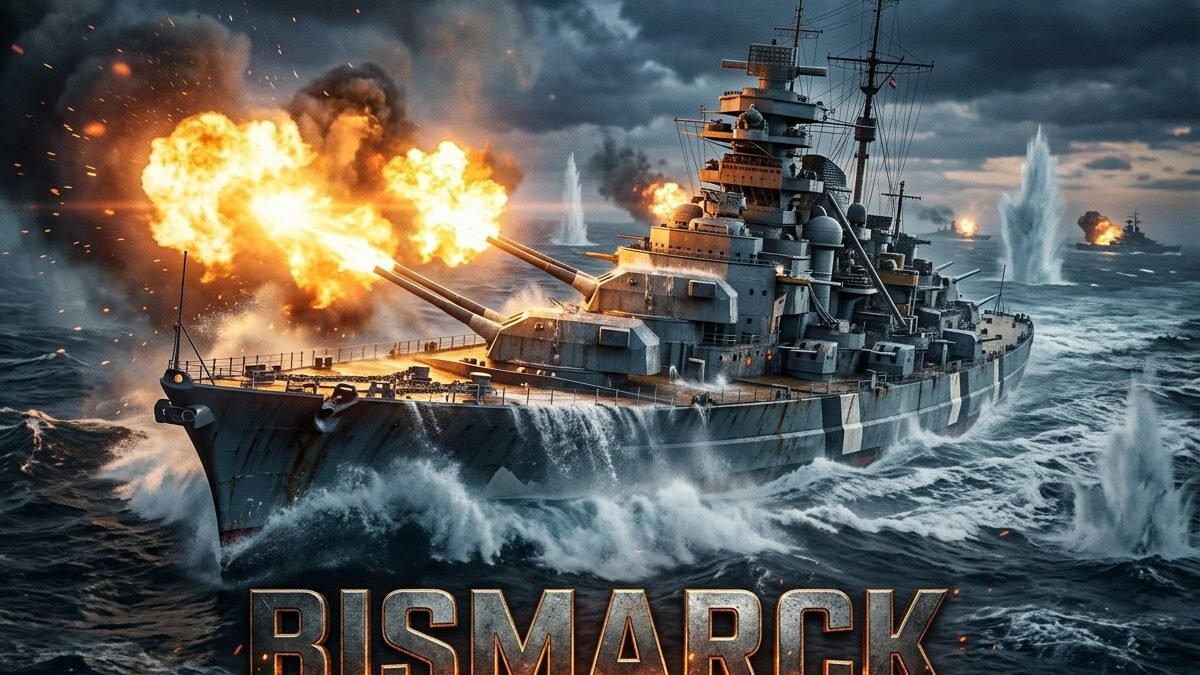
18 May 1941 · Operation Rheinübung Begins
Bismarck and heavy cruiser Prinz Eugen sail from the Baltic through the Kattegat toward Norwegian waters, monitored by Swedish and British intelligence networks.
For eight days in May 1941, the German battleship Bismarck sailed through the North Atlantic as one of the most closely watched warships in the world. Royal Navy cruisers shadowed her. Aircraft searched overhead. Admiralty operatives in London tracked every rumour, every radio intercept, every possible course she might take toward the Atlantic convoys that kept Britain supplied. When she finally appeared at the end of that week and engaged two British capital ships in the Denmark Strait, the encounter lasted less than twenty minutes. It reshaped the strategic picture of the Atlantic war and turned a modern battleship into one of the most written-about vessels of the Second World War.
Bismarck was not the largest battleship ever built. She was not even the most heavily armed warship afloat in 1941. What made her famous — and what kept historians arguing about her for decades after — was the combination of her design, the destruction of HMS Hood, the extraordinary British pursuit that followed, and the unresolved questions surrounding her final battle and sinking. Her operational career lasted barely eight months and included only one offensive sortie. That single mission produced enough drama, loss, and controversy to fill libraries.
This dossier examines Bismarck from her conception and construction through her only combat operation, her final battle, and the wreck that now rests on the floor of the North Atlantic. It does not treat her as an invincible legend, nor does it reduce a complex sequence of events to a single lucky torpedo or a convenient myth.
THE BIRTH OF BISMARCK
Germany’s naval rebuilding after the First World War was constrained from the start. The Treaty of Versailles limited the Kriegsmarine to a small force of surface ships and explicitly forbade the construction of new battleships. For more than a decade, German naval planners worked within those limits, building small cruisers and training vessels while thinking about what a future high-seas fleet would need. The Anglo-German Naval Agreement of 1935 eased those restrictions, allowing Germany to build capital ships up to 35,000 tons under the terms of the Washington Treaty framework. The agreement opened the door to the large battleship designs that had been waiting in German naval offices for years.
Bismarck was ordered in response to a broader European naval race. France had laid down the Richelieu-class battleships. Italy was building the Littorio-class. Britain and the United States continued to produce treaty-compliant capital ships. German planners wanted a battleship that could stand in the Atlantic as a true raider — fast enough to outrun what could not catch her, heavily armed enough to punish merchant vessels and weaker warships, and protected well enough to survive the sort of punishment a major fleet engagement might deliver. That requirement shaped the Bismarck-class design more than any single political directive.
The contract for Bismarck went to the Blohm & Voss shipyard in Hamburg. The keel was laid on 1 July 1936 at the Helgen IX building berth. Construction progressed through the late 1930s, a period in which German naval policy shifted steadily toward rearmament and war planning. The ship was launched on 14 February 1939 in a ceremony at Hamburg. The launching was christened by Dorothee von Löwenfeld, the granddaughter of Otto von Bismarck, the nineteenth-century German chancellor after whom the ship was named. Adolf Hitler, by then the head of the German state, made the christening speech.
Fitting-out work followed the launch. During that period, the ship’s original straight stem was replaced with a raked “Atlantic bow” of the type already used on the Scharnhorst-class battleships. Work on Bismarck was completed in August 1940, and she was commissioned into the Kriegsmarine on 24 August 1940. Her sister ship, Tirpitz, was being built at the same time at the Kriegsmarinewerft in Wilhelmshaven. Tirpitz was commissioned in February 1941, weeks before Bismarck went to sea on her first offensive operation.
DESIGN, ARMAMENT & SPECIFICATIONS
Bismarck was a fast battleship built to operate independently against Allied shipping. She was not a battlecruiser sacrificing protection for speed, nor was she a slow, heavily protected battleship designed solely for line-of-battle engagements. The design attempted to reconcile firepower, protection, and speed in a hull constrained by pre-war treaty frameworks and by the practical limits of German shipbuilding infrastructure.
The ship displaced 41,700 metric tons at standard displacement and approximately 50,300 metric tons at full load. She measured 251 metres overall and 241.6 metres at the waterline, with a beam of 36 metres. Her designed draft was 9.3 metres, though in practice the draft at full load ran deeper. She was 90 per cent welded construction, with a double bottom over 83 per cent of her hull length and twenty-two watertight compartments. The building cost for Bismarck was approximately 196 million Reichsmarks.
Her propulsion system consisted of twelve Wagner superheated boilers driving three geared steam turbines connected to three screw propellers. During trials she achieved just over 30 knots, a speed that put her among the fastest battleships of her era. Her range was substantial: roughly 8,870 nautical miles at 19 knots, enough to operate in the central Atlantic and still have the fuel to fight and return. That range was one of the design’s most important operational achievements, because a battleship that could not stay at sea for extended periods was not useful as an Atlantic raider.
Anton, Bruno, Caesar & Dora: The 38 cm SK C/34 Main Battery
The main armament consisted of eight 38-centimetre (15-inch) SK C/34 guns arranged in four twin turrets. The two forward turrets, named Anton and Bruno, were superfiring; the two aft turrets, Caesar and Dora, were also paired. The 38-centimetre gun was a Krupp design that fired an 800-kilogram armour-piercing projectile at a muzzle velocity of about 820 metres per second, giving a maximum range of roughly 36,500 metres at 30 degrees elevation. Under optimal conditions the guns could fire one round every 18 seconds, or three rounds per minute, per gun. The total shell supply for the main battery was roughly 940 to 960 rounds, an average of about 115 to 120 rounds per gun.
The choice of four twin turrets rather than triple or quadruple mountings was deliberate. Other navies had pursued triple turrets to increase the total number of heavy guns without increasing the number of turret positions, which shortened the protected citadel. German designers worried that a triple turret would reduce the rate of fire per barrel and that a single lucky hit could disable a larger share of the ship’s firepower if more barrels were concentrated in one mounting. Four twin turrets offered a better field of fire and a more manageable salvo sequence, at the cost of leaving the ship with fewer 38-centimetre guns than some contemporaries.
The Secondary & Anti-Aircraft Batteries
The secondary battery comprised twelve 15-centimetre (5.9-inch) SK C/28 guns in six twin turrets. These guns fired a 45.3-kilogram shell at a muzzle velocity of about 875 metres per second, with a maximum range near 23,000 metres at 40 degrees elevation. They could fire at roughly six rounds per minute. The 15-centimetre turrets were designed with anti-surface work in mind, and their low-angle characteristics drew criticism from later naval historians, who noted that British and American battleship designers were moving toward dual-purpose guns that could serve both surface and anti-aircraft roles. German planners gave priority to defence against destroyer and light surface attack, reasoning that a battleship operating away from its own fleet would face more risk from lighter surface forces than from aircraft.
The anti-aircraft battery included sixteen 10.5-centimetre SK C/33 guns in eight twin mountings, sixteen 3.7-centimetre SK C/30 guns in eight twin mountings, and twelve 2-centimetre FlaK 30 guns in single mountings. These weapons were designed to defend against the aircraft that would increasingly threaten any capital ship at sea. By 1941, even before Bismarck sortied, the Battle of the Atlantic was already demonstrating that aircraft could extend the reach of naval warfare far beyond the horizon.
Germany’s Bismarck in Colors (4K 60FPS)
High-frame-rate study of the raked Atlantic bow, 36-meter beam flare, stabilized optical rangefinder domes, and forward 38 cm twin turrets Anton and Bruno.
Bismarck’s 15 cm SK C/28 Secondary Battery
Close-quarters inspection of the twin 15 cm SK C/28 surface-defense turrets and superfiring 10.5 cm SK C/33 heavy anti-aircraft mounts amidships.
Steel, Silence & a Sea-Wide Warning
Quartering profile showing how the forward citadel, armored conning tower, and heavy midships boat and floatplane cranes sat relative to the waterline.
Citadel Armor Scheme, Internal Protection & Complement
Bismarck‘s armour was designed to provide heavy protection across the ship’s critical areas. The main belt ranged from 220 to 320 millimetres in thickness, with the thickest section covering the central citadel where the turrets, magazines, and machinery spaces were located. That thickest belt was capped at either end by 220-millimetre transverse bulkheads. The main armoured deck ranged from 100 to 120 millimetres amidships, tapering to 60 millimetres at the bow and 80 millimetres at the stern. The forward conning tower had 350-millimetre sides and a 200-millimetre roof; the aft conning tower was much lighter, with 150-millimetre sides and a 50-millimetre roof. The main battery turret faces were protected by 360-millimetre armour, with 220-millimetre sides and 180-millimetre forward roofs.
The underwater protection design was intended to resist significant explosive damage, with an armour depth of about 5.5 metres and overall bottom protection roughly 1.7 metres deep. The citadel could, in theory, resist a hit from a 38-centimetre shell fired at certain ranges against the machinery spaces and at longer ranges against the magazines. Like every battleship design, the armour scheme reflected trade-offs. Bismarck‘s deck was mounted relatively low in the hull, which reduced the volume of internal space protected by the armoured citadel when compared with contemporary British and American designs that placed a thick armoured deck higher in the ship. That difference mattered when shells struck from above or when plunging fire reached the deck.
The ship’s standard complement was 103 officers and 1,962 enlisted men, though when Bismarck left port with fleet staff, prize crews, and war correspondents aboard the total exceeded 2,200. The crew was organised into twelve divisions of 180 to 220 men, with the first six divisions assigned to armament duties, the seventh to specialists such as cooks and carpenters, the eighth to ammunition handling, and the last three to engine-room personnel.
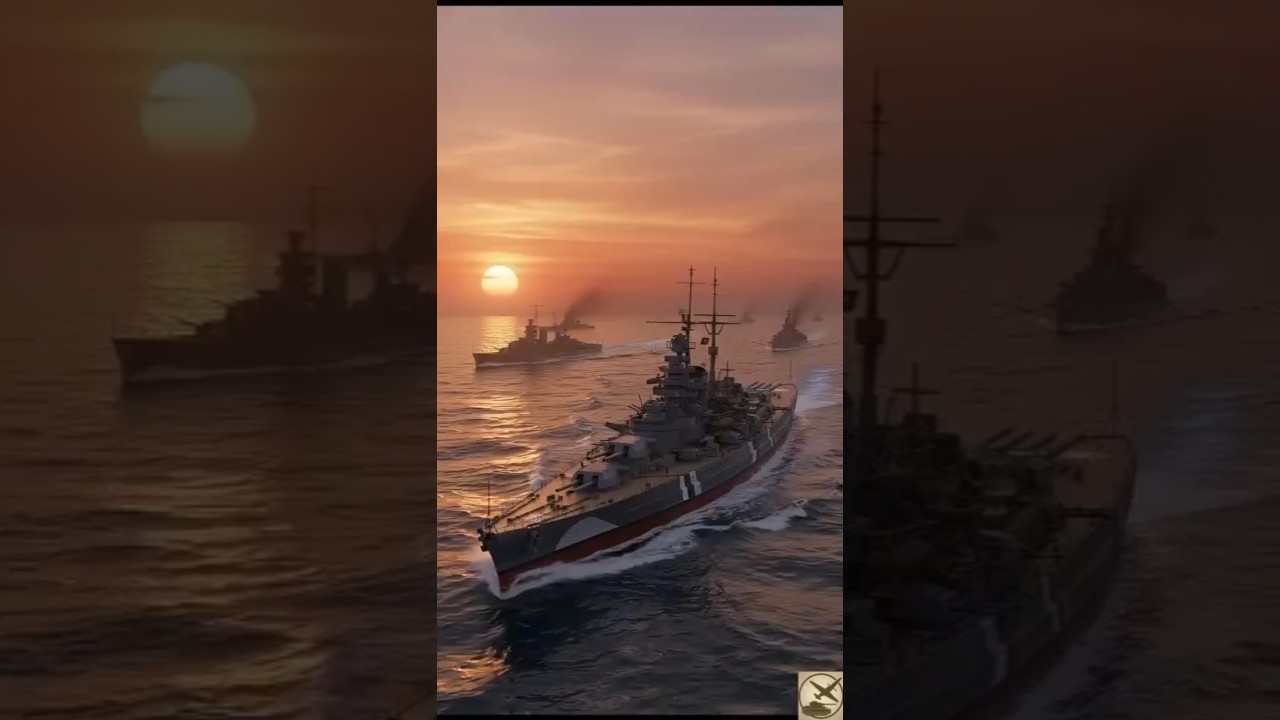
OPERATION RHEINÜBUNG
Operation Rheinübung was the operational name for Bismarck‘s Atlantic sortie. The plan was straightforward in its broad outline: break out into the Atlantic Ocean with a heavy cruiser, disrupt Allied convoys travelling between North America and Britain, and inflict enough damage on the shipping that sustained Britain to draw disproportionate British naval resources into hunting the raiders.
The operation began on 18 May 1941, when Bismarck and the heavy cruiser Prinz Eugen sailed from the Baltic. The two ships moved through the Kattegat and into Norwegian waters, where they were detected on several occasions by British reconnaissance and signal intelligence. The Kriegsmarine had planned for the possibility of detection, because any attempt to reach the Atlantic without being observed was increasingly unlikely in a war in which the Royal Air Force, coastal radar networks, and ship-borne listeners were already dense across northern waters.
The developing pursuit involved several British forces. Heavy cruisers HMS Norfolk and HMS Suffolk were stationed to watch the Denmark Strait between Iceland and Greenland, the most likely route for a battleship trying to reach the Atlantic. When those cruisers detected Bismarck and Prinz Eugen in the Denmark Strait on 23 May, the alarm went out across the Royal Navy. The reaction from the Admiralty was swift and severe, in part because the British had already suffered heavy losses to German surface raiders and U-boats and in part because a battleship operating free in the Atlantic represented a threat that could not be ignored.
THE BATTLE OF THE DENMARK STRAIT
On the morning of 24 May 1941, HMS Hood and HMS Prince of Wales sailed to intercept the German squadron. Hood was a battlecruiser completed in 1920, fast but with belt armour that, by 1941 standards, was known to be insufficient against modern 15-inch shells. Prince of Wales was a King George V-class battleship still relatively new, with a 14-inch main battery and a 15-inch armour belt. She was, by some accounts, still carrying civilian workmen aboard when she sailed into the Denmark Strait pursuit.
The British ships made contact with Bismarck and Prinz Eugen in the Denmark Strait. Hood initially engaged Prinz Eugen, probably because the cruiser was mistaken for Bismarck in the poor visibility. Prince of Wales engaged Bismarck. What followed was a short, violent gunnery exchange at relatively long range in which both sides landed hits.
Bismarck‘s main battery scored several hits on Prince of Wales. Four 38-centimetre shells struck the British battleship. One passed through the starboard side underwater without exploding and caused minor flooding. Two struck the upper works without exploding. A fourth hit caused more serious damage. The hits did not stop Prince of Wales‘s main armament; she continued to fire throughout the engagement. Prinz Eugen‘s 20.3-centimetre guns also fired, and two underwater hits from that cruiser added to Prince of Wales‘s flooding and slowed her by an estimated knot or two.
The turn of the battle that mattered most came when Bismarck‘s fire reached Hood. A 38-centimetre shell from Bismarck, and possibly fire from Prinz Eugen as well, penetrated Hood‘s forward/aft magazine area. The result was not a simple explosion but a catastrophic detonation that destroyed the battlecruiser in moments. Of Hood‘s crew of 1,418 men, only three survived: Ted Briggs, Bob Tilburn, and William Dundas. The loss of Hood was immediate and nearly total.
Bismarck & Prinz Eugen in battle formation.
A 38 cm shell from Bismarck penetrates Hood‘s magazine, triggering a massive detonation. Only 3 of 1,418 men survive (Ted Briggs, Bob Tilburn, William Dundas).
Four 38 cm shells from Bismarck and two 20.3 cm underwater hits from Prinz Eugen strike the new British battleship, causing flooding and bridge damage.
Prince of Wales lands three 14-inch hits on Bismarck. One forward hit ruptures fuel tanks, causing the loss of ~1,000 tons of oil and forcing Admiral Lütjens to abort the Atlantic raid and steer for occupied France.
Part 2 restoration: close-quarters pass & 38 cm gunfire.
Bismarck was hit by Prince of Wales three times during the battle. One hit forward damaged a fuel oil tank and caused Bismarck to lose roughly 1,000 tons of fuel oil from a forward tank. A second hit aft damaged the port wing of the aft turret and caused some flooding. A third hit struck the upper works without exploding. The fuel loss was the most operationally significant of the three hits, because it reduced Bismarck‘s range and ultimately shaped the later decision to head for occupied France rather than continue raiding. The damage also meant that Bismarck could not complete her original mission.
The battle changed everything. The raiding mission was over before it had really begun. Bismarck had destroyed a British battlecruiser, but she had been hit and was losing fuel. Prinz Eugen was still intact and capable of continuing, but the German commander, Konteradmiral Günther Lütjens, had to make a choice about what to do next. He chose to detach Prinz Eugen to continue the operation independently while Bismarck headed for a safe port to repair the damage and refuel. That choice turned the operation from a raid into a flight.
BISMARCK’S ESCAPE & THE FATAL RUDDER HIT
After the Denmark Strait battle, Bismarck and Prinz Eugen separated. Prinz Eugen disappeared into the Atlantic for a time, while Bismarck ran for the general direction of occupied France. The fuel problem was real. Bismarck‘s damaged forward tank had lost roughly 1,000 tons of oil, and the ship’s remaining fuel was not enough to guarantee a safe return to Germany through the North Sea without risking interception. A voyage to a French port such as Brest offered the chance to repair, refuel, and possibly sort out the damage before returning to Germany through a safer route.
The British did not let her run unopposed. On the evening of 24 May, aircraft from the aircraft carrier HMS Victorious located Bismarck and launched an attack — the first time carrier-borne aircraft had attacked a capital ship in mid-ocean during the war. Fifteen Fairey Swordfish torpedo bombers took off and attacked through the night. One torpedo struck Bismarck amidships, but it did no serious damage. The attack failed to stop her, but it demonstrated that the British had both the aircraft and the willingness to take the fight to a battleship far from any land base.
On 25 May, Bismarck was resighted by British forces early in the morning. The German ship continued to run, but the British tracking effort was now intense. Bismarck‘s rudder and steering were still functional at this point. She was not yet the helpless target that later legend would describe. She was a damaged but still powerful battleship trying to reach a port in France before the British could bring a superior force to bear.
The next critical event came on the evening of 26 May, when aircraft from the aircraft carrier HMS Ark Royal, operating as part of Force H from Gibraltar, located Bismarck. Fifteen Swordfish torpedo bombers were launched at 14:50 in bad weather. The attack achieved a hit that mattered. One torpedo struck Bismarck astern and jammed the rudder and steering gear at an angle of about 12 degrees to port. The crew attempted to repair the damage, but the rudder could not be freed. Bismarck was now unable to steer effectively. She could still make way, but she could only circle slowly — at roughly seven knots — and could not maintain a course toward France.
It is inaccurate to say that a single Swordfish or a single torpedo sank Bismarck. The torpedo attack on 26 May crippled her steering and made her escape impossible, but the ship remained afloat, still armed, and still dangerous. The crew tried to control her by varying engine power on different shafts, but the damage was such that the ship could not hold a straight course. The rudder jammed hard over, and Bismarck began to circle.
The British were now close. Admiral Sir John Tovey, commanding elements of the Home Fleet from the battleship HMS King George V, had been pursuing Bismarck for days. On the morning of 27 May, Tovey’s force, joined by the battleship HMS Rodney and the heavy cruisers HMS Norfolk and HMS Dorsetshire, closed in on the crippled German battleship.
THE FINAL BATTLE: 27 MAY 1941
The final battle began on the morning of 27 May 1941, at a range of roughly 25,000 metres. HMS King George V, under Admiral Tovey, and HMS Rodney, under Captain Frederick Dalrymple-Hamilton, opened fire on Bismarck. The British battleships were newer and better coordinated than Hood had been, and they fired with the benefit of the pursuit track and the earlier radar and reconnaissance information gathered over the previous days.
Bismarck‘s armament was still functioning. Her main battery fired back, and her first salvoes fell close to Rodney, though neither British battleship was hit. Bismarck‘s gunners were fighting a ship that could not manoeuvre properly, but they were still capable of accurate fire. For a period, the German battleship presented a serious threat despite her damaged rudder.
The engagement continued with heavy British fire from both battleships, supported by the heavy cruisers. Bismarck sustained extensive damage. Her aft turret was disabled, her fire-control systems were degraded, and her hull was increasingly penetrated. By about 09:31, Bismarck was no longer returning fire effectively. By 10:15, she was a burning wreck. The accumulated damage from British gunfire and from the torpedo attacks over the previous days was severe.
Admiral Tovey was running short of fuel, and he ordered the heavy cruiser HMS Dorsetshire to finish Bismarck off with torpedoes. Dorsetshire fired a spread of torpedoes that struck Bismarck. At about 10:39, Bismarck sank.
Overlapping Causes: British Shells, Torpedoes, and Crew Scuttling
The sinking was not a simple event attributable to one cause. Several overlapping factors produced the result. Bismarck had been damaged by British gunfire and torpedoes over the course of the pursuit. She had lost steering control after the 26 May torpedo hit. She had been unable to reach a port for repairs and had been hunted by a force that grew larger as the pursuit continued. She had been battered by heavy gunfire in the final engagement. She had been hit by torpedoes from Dorsetshire. And, according to the later evidence from the wreck, she had been scuttled by her own crew.
The scuttling is a point that later expeditions confirmed. When Robert Ballard located the wreck in 1989 and subsequent surveys examined it more closely, the evidence suggested that the ship’s valves and sea cocks had been opened by the crew before she went down. That does not mean British fire and torpedoes were irrelevant. Most experts agree that the accumulated battle damage would have caused Bismarck to sink eventually even without scuttling. Scuttling accelerated the end and prevented the ship from being boarded by the British, but it did not create the sinking from nothing. The distinction matters, because it reflects the reality of a ship that was heavily damaged, unable to manoeuvre, and being finished off by a concentrated British force.
WHAT HAPPENED TO THE CREW?
Bismarck carried a crew that numbered roughly 2,200 men on her final operation, including the standard complement of officers and enlisted men plus additional staff and observers. The sinking on 27 May killed the overwhelming majority of them. The British heavy cruiser HMS Dorsetshire rescued 82 survivors from the water, and a small number were also picked up by the destroyer HMS Maori, bringing the total number of survivors to approximately 115. The ship’s cat was also among the survivors, a small detail that naval historians have recorded without sensationalising it.
The conditions after the sinking were grim. Men who survived the initial destruction and reached the water were exposed to cold Atlantic conditions for hours before rescue. The rescue effort was curtailed by a reported U-boat sighting, which caused the British ships to withdraw temporarily and focus on avoiding a submarine rather than continuing the pick-up. That interruption meant that many men who had survived the sinking itself did not survive the hours in the water.
The senior survivor was Burkhard von Müllenheim-Rechberg, a junior gunnery officer who later became a diplomat and wrote a detailed survivor’s account of the operation. His book remains one of the more important German sources on the sinking, and it is one of the few survivor narratives available in English translation. Other survivors were taken to Britain and held as prisoners of war. Their memories, like those of any survivors of a catastrophic sinking, are uneven and sometimes inconsistent with one another, which is why historians rely on multiple accounts and on the physical evidence of the wreck rather than on a single recollection.
The loss of life on Bismarck should be treated with the same seriousness as the loss of life on Hood. Both ships lost large proportions of their crews in a matter of minutes or hours. In Hood‘s case, only three men survived out of 1,418. In Bismarck‘s case, roughly 115 survived out of more than 2,200. The numbers are not abstract. They represent the human cost of a single surface engagement and a chase that followed it.
THE WRECK AT 4,791 METRES
The wreck of Bismarck was located in June 1989 by Robert Ballard, the oceanographer who had previously located the wreck of RMS Titanic. The discovery took place roughly 400 miles west of Brest, in the North Atlantic, at a depth of approximately 4,791 metres. Bismarck rests on her keel, upright, in the quiet cold of the deep sea.
What the Hull Reveals — And What Underwater Evidence Cannot Answer
The condition of the wreck has been surveyed by several subsequent expeditions, and those surveys have informed the historical interpretation of the sinking. The hull is largely intact, but with significant damage from the final battle, including a large hole in the bow area, damage to the armoured deck, and puncture marks consistent with torpedo and shell hits. The damage pattern is consistent with a ship that was heavily engaged, slow, and unable to manoeuvre at the time she went down.
The condition of certain valves, sea cocks, and internal access points also suggested that the crew had opened some of them before the ship sank—supporting the account that Bismarck was scuttled in her final moments to accelerate a sinking already made inevitable by battle damage.
Underwater evidence has limits. A wreck cannot tell historians everything about a surface engagement. It cannot reconstruct the sequence of British gunfire with precision, it cannot identify every shell that struck the ship, and it cannot establish exactly what orders were given on the bridge in the final minutes. What it can do is confirm the broad picture: that Bismarck was heavily damaged, that she sank in the location where the British pursuit had brought her, and that her crew took action to scuttle her before the end. Those facts matter because they prevent the story from sliding into a single simplified explanation.
Preservation and ethical issues surround the wreck site. Bismarck lies at a depth that makes recreational diving impossible and makes any access technically difficult and expensive. The site is a war grave, and the question of whether and how it should be visited, photographed, or surveyed has been discussed for decades. The wreck is not a theme park attraction. It is the resting place of a large number of men, and any engagement with it should respect that reality. At the same time, the scientific and historical value of the wreck has been real, and responsible surveys have added to the historical record without disturbing the site unnecessarily.
CAPITAL SHIP DUEL: BISMARCK VS. HMS HOOD
The comparison between Bismarck and HMS Hood is one of the most frequently requested topics in naval-history search queries, but it is often treated as a simple contest of which ship was “better.” The reality is more nuanced. The two ships were built for different purposes in different eras, and the Denmark Strait engagement showed both the strengths and the weaknesses of each.
HMS Hood was a battlecruiser completed in 1920. She was fast, with a designed speed of around 32 knots, and she carried eight 15-inch guns, the same calibre as Bismarck‘s main battery. She was larger than Bismarck at standard displacement. But her belt armour was relatively thin by 1941 standards, and she had been designed before the full implications of long-range gunnery and plunging fire had been fully absorbed into battleship doctrine. Her role had been that of a fast capital ship capable of outrunning what she could not beat and outgunning what she could not outrun. By 1941, that philosophy had been tested against the reality of modern battleship fire.
Bismarck was a fast battleship completed in 1940. She was not as fast as Hood, but she was better protected, with a 320-millimetre belt and heavier turret and deck armour. She carried eight 15-inch guns of her own, but her design emphasised protection and sustained Atlantic operations rather than pure speed. Her range and fuel capacity made her a more self-sufficient raider than Hood would have been.
In the Denmark Strait, the tactical circumstances mattered as much as the ships. Hood engaged Prinz Eugen first, possibly because the cruiser was mistaken for Bismarck. That error put the battlecruiser on a course that exposed her to German fire before she could bring her full advantage to bear. Prince of Wales engaged Bismarck directly and scored several hits, but the hits were not immediately disabling. Bismarck‘s fire reached Hood‘s magazine, and the result was catastrophic.
| Aspect | KMS Bismarck (Germany) | HMS Hood (Royal Navy) |
|---|---|---|
| Classification | Fast Battleship | Admiral-class Battlecruiser |
| Year Completed | 1940 (Blohm & Voss, Hamburg) | 1920 (John Brown & Co., Clydebank) |
| Standard Displacement | About 41,700 t (50,300 t full load) | About 42,037 t |
| Main Armament | 8 × 38 cm (15 in) SK C/34 (4 twin turrets) | 8 × 38.1 cm (15 in) BL Mk I (4 twin turrets) |
| Maximum Speed | About 30 knots | About 32 knots (design) |
| Belt Armour | Up to 320 mm Krupp cemented steel | Up to about 12 in (305 mm) in key areas; thinner overall by 1941 standards |
| Operational Fate | Sunk 27 May 1941 (North Atlantic) | Destroyed 24 May 1941 (Denmark Strait) |
HISTORICAL SIGNIFICANCE & MYTH VS. RECORD
Bismarck became famous for reasons that go beyond her technical design. Six converging factors produced an unusually high level of attention, both during the war and after it:
First, she represented the culmination of German battleship design. At the time of her completion, she and Tirpitz were the largest battleships ever built by Germany, and among the largest built by any European power. She embodied a modern naval ambition that had been years in the making.
Second, her destruction of HMS Hood captured public attention in a way that few naval engagements did. Hood was a familiar symbol of British naval power, and her loss was sudden, total, and nearly complete. Only three men survived. The loss was not just a tactical setback; it was a public and psychological shock.
Third, the pursuit that followed was extraordinary in scale. The Royal Navy committed dozens of warships across multiple fleets to find and destroy a single battleship. That effort reflected both the strategic importance of the Atlantic shipping lanes and the political need to avenge Hood. The pursuit became one of the most dramatic episodes of the war at sea, and it was followed closely by the British public and by observers abroad.
Fourth, Bismarck‘s operational career was very short. She conducted only one offensive operation before she was lost. A ship that is famous for a single dramatic mission, lasting only a few days, occupies a different place in the historical imagination from a ship that fought a long succession of engagements. Bismarck‘s narrative is concentrated: one sail, one battle, one chase, one sinking.
Fifth, the survival of wartime imagery kept the ship visible. Archive photographs, newsreel footage, and later underwater surveys all contributed to a continuous public presence. Bismarck never disappeared from view after 1941 in the way that some warships fade from public memory.
Sixth, postwar books, documentaries, and popular culture kept the ship alive. Bismarck became a recurring subject in naval-history writing, in television and film, and in the broader culture of Second World War interest. Not everything written or broadcast about her was accurate, but the volume of attention ensured that she remained familiar to a wide audience.
The historical significance of Bismarck is real, but it is different from the mythology that grew around her. She was not an invincible monster. She was not the largest battleship ever built. She was not unsinkable. She was a modern, powerful, fast battleship that fought one serious engagement, damaged a British battleship, destroyed a British battlecruiser, and then was hunted down and sunk by a concentrated British force. Her fame came from that concentrated drama and from the broader context of the Battle of the Atlantic, not from any single superlative.
Was Bismarck really “unsinkable”?
No. The claim was popular in some postwar accounts and wartime propaganda, but it does not hold up against the historical record. Bismarck was heavily damaged by British gunfire and torpedoes, had lost steering, and was scuttled by her own crew. Most experts agree that the accumulated battle damage would have caused her to sink eventually.
Did one Swordfish torpedo single-handedly sink Bismarck?
No. A torpedo from an Ark Royal Swordfish on 26 May 1941 jammed Bismarck‘s rudder and made escape impossible, but the ship remained afloat and armed. The final sinking on 27 May resulted from a combination of gunfire, torpedoes, and scuttling. The torpedo was critical to the chain of events, but it was not the single cause of the sinking.
Was Bismarck the largest battleship ever built?
No. The Yamato-class battleships of the Imperial Japanese Navy were significantly larger, with a standard displacement of roughly 65,000 tons (71,111 tons full load). The American Iowa-class battleships were also larger than Bismarck. Bismarck was the largest battleship built by Germany and among the largest in Europe, but not the largest in the world.
Was Hood completely destroyed by one shell in a simple way?
The loss of Hood was sudden and nearly total, but the mechanics of the destruction were more complex than a single shell hitting a magazine in a straightforward way. The main cause was a 38-centimetre shell from Bismarck that penetrated the magazine area, triggering a sequence of fire, detonation, and rapid structural loss that claimed 1,415 lives.
Was Bismarck’s crew entirely wiped out?
No. About 115 men survived out of a crew of roughly 2,200. HMS Dorsetshire rescued 82 survivors, and a small number were picked up by HMS Maori. While the overwhelming majority of the crew died after a U-boat sighting curtailed rescue operations, the claim that everyone was lost is inaccurate.
Was the ship intentionally scuttled?
Yes. Later evidence from the wreck, including the condition of valves and sea cocks, indicates that the crew opened them before the ship sank. Scuttling was a contributing factor that accelerated the end, but it did not replace the fatal damage inflicted by British gunfire and torpedoes.
Conclusion: The Concentrated Drama of a Single Sortie
Bismarck was a ship built for a specific strategic purpose: to serve as a powerful, long-range raider in the Atlantic. She was a modern battleship by the standards of 1940, with a strong main battery, heavy armour, and the speed and range to operate independently for extended periods. She was not the largest battleship ever built, and she was not invincible, but she was serious enough that her breakout into the Atlantic justified an extraordinary British pursuit.
Her only combat operation produced one of the most famous naval engagements of the Second World War. In the Denmark Strait, she destroyed HMS Hood and damaged HMS Prince of Wales, but she also took hits that ended her raiding mission. The pursuit that followed drew in warships from multiple British fleets and squadrons of aircraft, and it ended with Bismarck unable to steer, battered by gunfire and torpedoes, and scuttled by her own crew on the morning of 27 May 1941.
The loss of Bismarck, like the loss of Hood, was a human catastrophe as well as a naval event. More than 2,000 German sailors died. Only about 115 survived. The wreck on the Atlantic seabed, discovered in 1989, has confirmed the broad outline of the sinking and the role of scuttling, while also showing the limits of what underwater evidence can tell us about the final minutes of a surface battle. Bismarck remains one of the most studied battleships of the Second World War because her career compressed so much into so short a time: modern design, a single dramatic operation, the destruction of a famous British battlecruiser, an intense pursuit, and a sinking that has generated continuing historical discussion.
Bismarck‘s story sits inside the wider Battle of the Atlantic, the German surface-raiding campaign, and the strategic rivalry between the Kriegsmarine and the Royal Navy. Explore these connected subjects across the archive:
FREQUENTLY ASKED QUESTIONS
MORE FROM THE WW2 VISUAL ARCHIVE
 Dossier · File 007
The Steel Titan Reborn: Inside the Secret History and 4K Restoration of Battleship Yamato
Compare Bismarck with the largest battleship ever constructed: 71,111 tons full load, nine 46 cm Type 94 guns, Operation Ten-Go, and our Kure Arsenal Gray 4K restoration.
 Ordnance · File 014
The Roar of the “Chicago Piano”: Inside Britain’s QF 2-Pounder Pom-Pom Anti-Aircraft Gun
Explore the eight-barrelled 40 mm close-range fire shield mounted aboard HMS Hood, Prince of Wales, King George V, and HMS Howe.
 Vault · 1,100+ Restorations
Capital Ships, U-Boats & Naval Artillery: Complete 4K Restoration Vault
Browse over 1,100 colorized archival films and engineering analyses spanning the Kriegsmarine, Royal Navy, U.S. Navy, and Imperial Japanese Navy.
From the dockyards of Hamburg and Kure to the icy waters of the Denmark Strait, our hybrid human-machine restoration pipeline brings World War II naval history into authentic 4K clarity.
Hi, this is a comment.
To get started with moderating, editing, and deleting comments, please visit the Comments screen in the dashboard.
Commenter avatars come from Gravatar.