Red Castle of the Pacific: IJN Akagi’s Path from Cruiser Hull to Kido Butai Spearhead
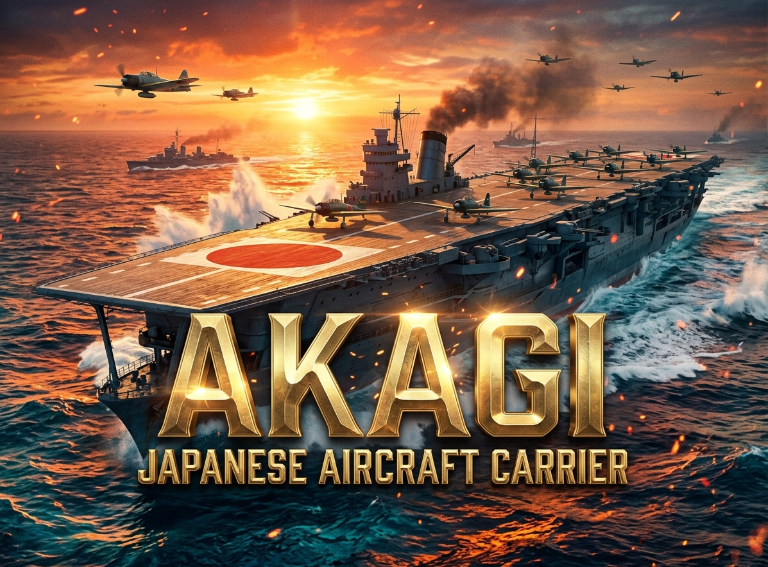
At first, shipwrights at Kure Naval Arsenal laid down IJN Akagi on 6 December 1920. She began as a 41,200-ton Amagi-class fast capital ship. However, the 1922 Washington Naval Treaty stopped her big-gun build on the slipway. Soon after, the 1923 Great Kantō quake wrecked her sister ship Amagi at Yokosuka. Thus, navy builders converted Akagi into a fast fleet carrier instead.
In March 1927, she joined the fleet with an unusual three-deck bow layout. Later, Sasebo Naval Arsenal rebuilt her from 1935 to 1938 into a single-deck flagship with a port-side bridge. As a result, under Vice Admiral Chūichi Nagumo, Akagi led the First Air Fleet (Kido Butai). Specifically, she led strikes across Pearl Harbor, Rabaul, Darwin, Ceylon, and Midway.
1st Carrier Division First, she served as flagship for Admiral Yamamoto and Vice Admiral Nagumo.
Port-Side Bridge Second, only Akagi and Hiryū carried port-side command bridges in WWII.
Six-Month Sweep Third, her air group struck Oahu, Rabaul, Darwin, Java, and Ceylon without defeat.
Midway Climax Last, one 1,000-pound bomb from Richard Best doomed her on 4 June 1942.
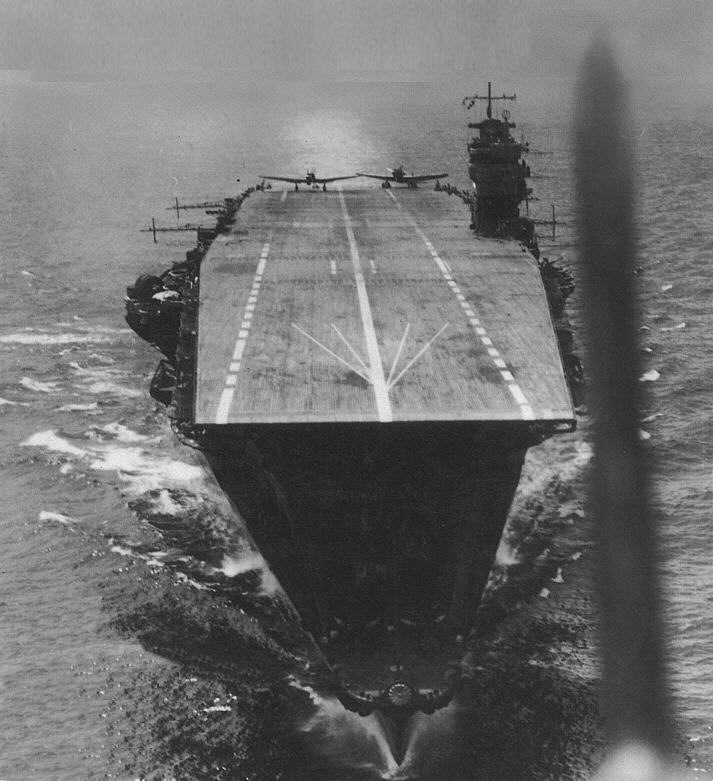
Primary Archival Plate — April 1942 (Indian Ocean Raid)
Seen from a climbing strike plane, IJN Akagi steams into the wind during Operation C in April 1942. At that time, Aichi D3A1 Type 99 “Val” dive bombers line her aft wood deck. Also, white canvas bundles holding futon bedding wrap her port-side bridge to stop bomb splinters.
Camera Angle First, shot from a climbing B5N2 torpedo plane astern.
Deck Spot Second, Aichi D3A1 dive bombers line the aft deck.
Thus, this plate comes from Kure Maritime Museum Plate P24 (Shizuo Fukui Archive).
Click Any Era to Inspect Akagi’s Three Hull Stages (1920–1942)
Stage 01 Profile: 1920–1922 Amagi-Class Hull
1920–1922 Amagi-Class Hull: At first, Kure Naval Arsenal laid down Akagi on 6 December 1920. The blueprint called for ten 41-cm (16.1-inch) guns in five twin turrets. However, the Washington Naval Treaty stopped her build on 6 February 1922. As a result, builders chose her fast hull for conversion into a carrier.
First, Tonnage 41,200 long tons
Second, Length 251.8 m (826 ft)
Third, Speed 30.0 kts / 131,200 shp
Last, Main Guns 10 × 41 cm (16.1 in)
Stage 02 Profile: 1927–1935 Triple Flight Deck Era
1927–1935 Triple Flight Deck Era: Next, after joining the fleet on 25 March 1927, Akagi used three stacked flight decks. She had a 190.2-meter upper landing deck, a 15-meter middle deck with twin 20-cm turrets,. In addition, she had a 55-meter lower bow takeoff deck. Also, she had no island bridge on top.
First, Full Load 34,364 long tons
Second, Three Decks 190.2m / 15m / 55m
Third, Trial Speed 32.5 kts / 131,000 shp
Last, Wing & Guns 60 Planes / 10 × 20cm
Stage 03 Profile: 1938–1942 Sasebo Full-Deck Flagship
1938–1942 Sasebo Full-Deck Rebuild: Later, Sasebo builders closed the two lower bow decks. They also stretched the main wood flight deck to 249.17 meters (817 ft 6 in). In addition, they added a midships plane lift. Builders also mounted a rare port-side island bridge clear of the starboard smoke funnel.
First, Deep Load 41,300 long tons
Second, Deck Length 249.17 m (817.5 ft)
Third, Shaft Power 133,000 shp / 31.5 kts
Last, Air Wing 91 Total (66 + 25)
Flagship Telemetry & Combat Benchmark Counters
41,300 Long Tons (Deep Load) First, her 1938 Sasebo rebuild raised deep weight to 41,300 long tons (36,500 standard).
133,000 Shaft Horsepower Second, four Gihon steam turbines and 19 Kampon boilers turned four bronze props.
31.5 Knots Fleet Speed Third, she steamed at 58.3 km/h with a 10,000-sea-mile cruising range at 16 knots.
91 Total Aircraft Capacity Fourth, she carried 66 active strike planes (Zero, Val, Kate) plus 25 reserve frames.
249.2 Meters Flight Deck Also, her 817.5-foot cypress wood deck used 3 plane lifts and 9 Type 1 stop wires.
5,490 Meters Wreck Depth Last, RV Petrel found her hull upright on the seabed 1,300 miles northwest of Oahu.
From Eight-Eight Fleet Cruiser to Treaty Aircraft Carrier
At first, Imperial Japanese Navy planners designed Akagi as the second of four fast Amagi-class battlecruisers. This plan formed a core part of Japan’s massive Eight-Eight Fleet Program. In fact, yard workers at Kure Naval Arsenal laid down her keel on 6 December 1920. Her original design called for a weight of 41,200 long tons and ten 41-cm (16.1-inch) main guns. In keeping with cruiser naming rules. Therefore, the Navy named her after Mount Akagi, a rugged volcano in Gunma whose kanji (赤城) mean “Red Castle”.
However, global diplomacy soon ended her career as a big-gun ship. On 6 February 1922, Tokyo signed the Washington Naval Treaty, which halted warship building around the world. Even so, Article IX allowed each signatory nation. Thus, each nation could convert two unfinished capital ship hulls into aircraft carriers up to 33,000 long tons. Thus, Japanese leaders picked the incomplete hulls of Amagi and Akagi for carrier conversion. At that time, the Army took Akagi’s finished 41-cm gun turrets to guard the Strait of Tsushima.
The 1923 Great Kantō Earthquake and the Survival of the Red Castle
Nature struck a sudden blow on 1 September 1923 during the Great Kantō earthquake. Because Amagi rested on the ways at Yokosuka near Tokyo, the violent ground shock twisted her steel keel beyond repair. As a result, the Navy ordered Amagi scrapped on the slipway. In her place, planners chose the slower Tosa-class battleship hull Kaga as Akagi’s new partner. In contrast, Akagi sat safe inside Kure harbor in western Japan. Thus, her frame suffered no damage, and crews began her carrier conversion on 19 November 1923.
Turning a narrow, fast cruiser hull into a stable seagoing airfield demanded major weight cuts. First, ship designers shaved her main waterline armor belt down from 254 mm (10 inches) to 152 mm (6 inches). Second, they thinned her protective deck steel from 96 mm to 79 mm. In addition, workers bolted a 102-mm anti-torpedo blister along the outer hull. This balanced the high weight of two enclosed hangar decks. At last, yard crews launched Akagi on 22 April 1925,. Next, she entered service on 25 March 1927 at a cost of 53 million yen.
Fine Underwater Lines and Early Stability Design
Below her tall steel hangars, Akagi kept the sleek underwater lines of a 30-knot cruiser. In fact, her hull measured 261.2 meters (857 feet) overall with a fine length-to-beam ratio above 8.9 to 1. Thanks to this narrow form, she sliced through heavy Pacific swells with very little drag. Yet stacking two huge enclosed hangars above the main strength deck raised her center of gravity and caught strong crosswinds.
To keep the ship stable in rough seas, Kure builders added deep side blisters. They also split the lower hull into tight watertight rooms. Also, they kept the thick inner bulkheads from the original cruiser plan to shield the boiler and turbine rooms. As a result, when Akagi finished fitting out in 1927, she weighed 26,900 long tons standard. At full load, she reached 34,364 long tons at full load. Hence, she met the strict tonnage limits of the Washington Treaty while keeping high speed.
Three Flight Decks Forward: Inside the 1927–1935 Experimental Layout
When Akagi steamed out for speed trials off Iyonada on 17 June 1927. At once, foreign attachés marveled at her strange bow profile. Along with her sister carrier Kaga, she was one of only two warships ever built with three stacked flight decks. Earlier, the Royal Navy had tested two flight decks aboard HMS Furious. Likewise, Japanese builders hoped a triple-deck bow would speed up plane launches and landings in battle.
In this early layout, Akagi’s top landing deck ran 190.2 meters (624 feet) toward the stern. Indeed, this top deck sloped downward from the middle toward both ends. That gentle slope helped light biplanes gain speed on takeoff and slow down after touch-down. Right below the front lip of the main deck. There, workers built a short 15-meter (49-foot) middle deck ahead of the bridge. What is more, a 55.02-meter (180.5-foot) lower takeoff deck stretched out over the bow directly from the lower hangar.
Biplane Launch Cycles and French Fievez Arresting Wires
In theory, this three-tier design allowed crews to launch and land planes at the same time. For example, light Mitsubishi B1M torpedo planes and Nakajima A1N fighters could roll straight out of the two enclosed hangars onto the middle and lower bow decks. At that time, returning scouts could land overhead on the 190.2-meter upper deck without blocking the takeoff run. Also, two large plane lifts linked the top landing deck with all three internal hangar levels.
To halt landing planes on the flush top deck, Akagi first used imported French Fievez cross-deck wires alongside British fore-and-aft cables. Also, she sailed without any fixed island bridge above the flight deck. Instead, officers steered the ship from a wide bridge gallery. That post sat right under the front edge of the top flight deck. During calm cruising watches, a small canvas charthouse could rise through a slot in the flight deck. Then it folded down flat before flight quarters.
Cruiser-Caliber 20-cm Guns and Starboard Exhaust Funnels
During the late 1920s, naval planners still feared that enemy cruisers might catch a carrier in surface combat during night or fog. Thus, Akagi mounted a heavy battery of ten 50-caliber 20-cm (7.9-inch) 3rd Year Type naval guns. First, she carried four of these big guns inside two twin turrets beside the short middle flight deck forward. Second, she mounted six single 20-cm guns inside armored hull casemates near the stern.
Those heavy guns fired 110-kg shells out to 24,000 meters. At the same time, six twin 12-cm (4.7-inch) 10th Year Type mounts on side sponsons guarded against high-flying bombers. At that time, to keep hot boiler smoke away from landing planes. Thus, builders vented her nineteen Kampon boilers through two stacks on the starboard side. Indeed, the huge front funnel curved 30 degrees downward toward the sea and used a cold seawater spray inside. Driven by 131,000 shaft hp, Akagi reached 32.5 knots on trials. That speed matched fast European warships like battleship Bismarck and battlecruiser HMS Hood.
Archival Photographic Plates: The Triple-Deck Era (1927–1934)
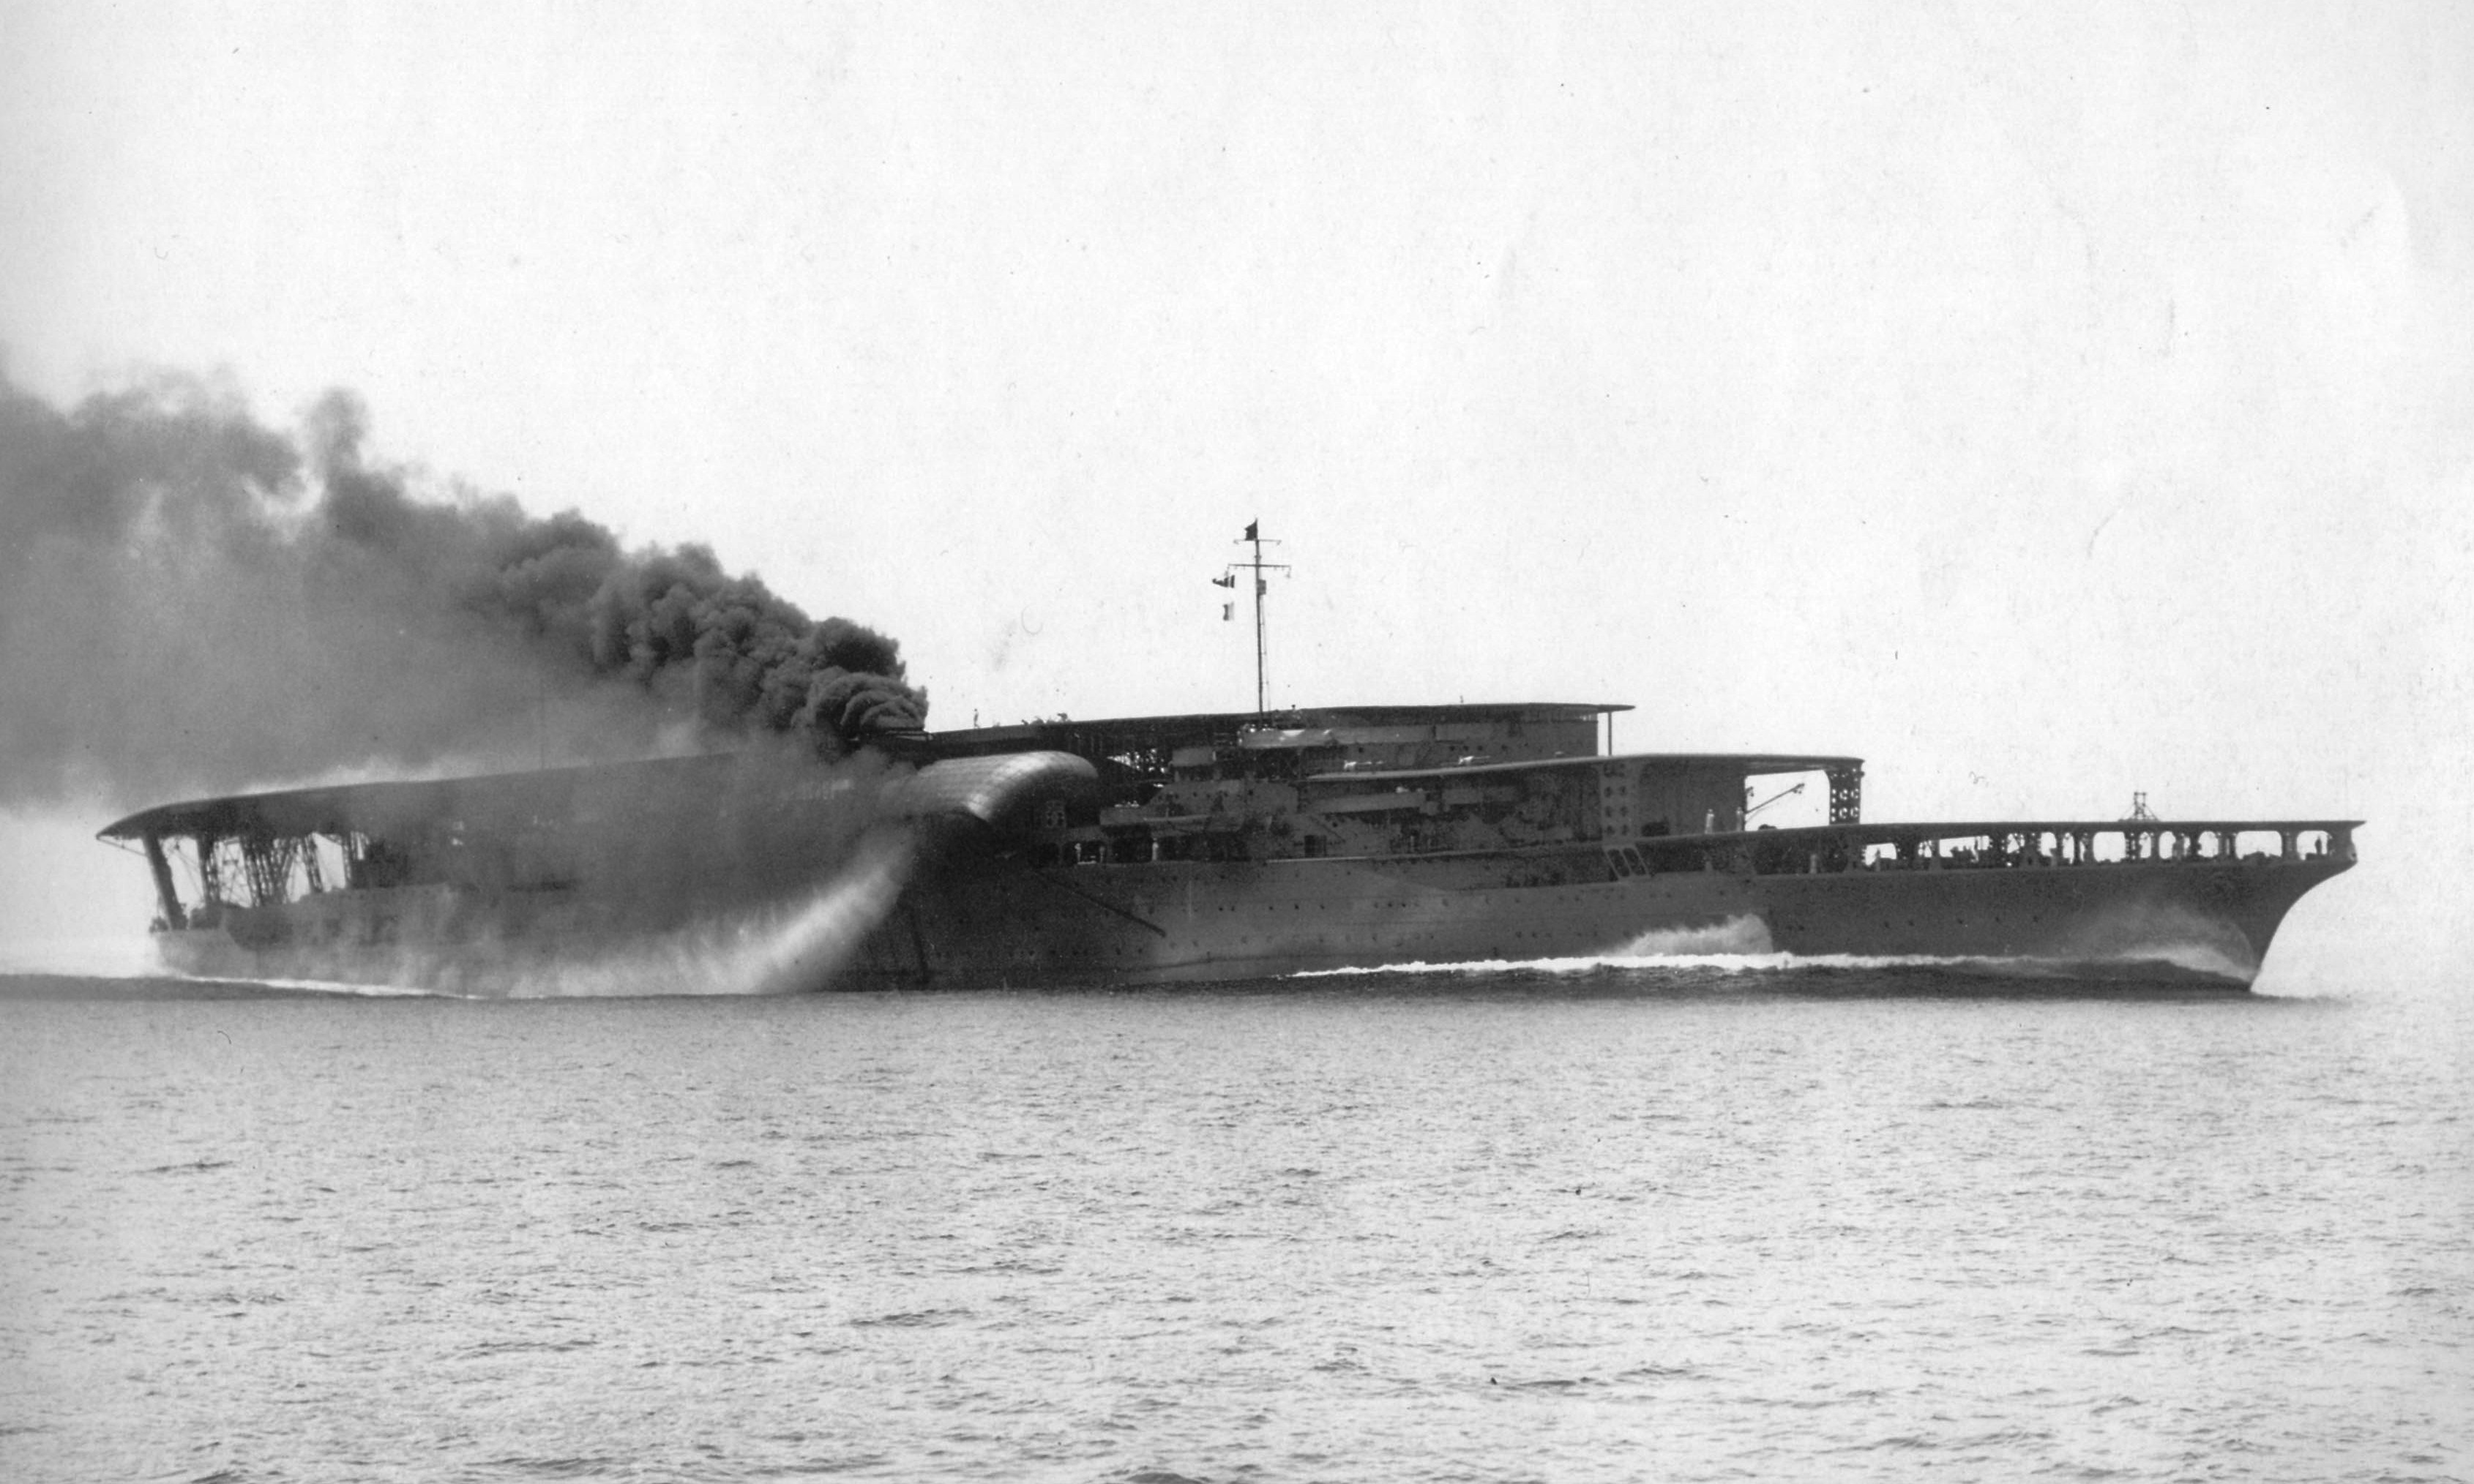 17 JUNE 1927 // IYONADA SEA TRIALS
Plate 01: Triple-Deck Sea Trials Off Iyonada (1927)
Taken off Iyo on 17 June 1927 during her 32.5-knot speed trials, Akagi shows her three-tiered bow layout. Notice the flush top deck and the downward-angled starboard main funnel next to the upright auxiliary stack.
 15 OCTOBER 1934 // OSAKA BAY
Plate 02: Stern Aspect in Osaka Bay (October 1934)
Anchored off Osaka on 15 October 1934, Akagi carries biplane Mitsubishi B1M and B2M torpedo bombers on her sloped top flight deck. At that time, heavy steel support pillars and 20-cm gun casemates line her stern.
Forging the Modern Flagship: The 1935–1938 Sasebo Rebuild
By the early 1930s, fast growth in aircraft size and weight made the triple-deck design obsolete. Earlier, when Captain Isoroku Yamamoto commanded Akagi in 1929, fleet drills had already shown that the short 15-meter middle deck was too cramped. In fact, blast and smoke from the forward twin 20-cm turrets blinded pilots and shook light planes. Also, new all-metal monoplanes needed a single long runway from bow to stern.
As a result, after her sister ship Kaga finished a full-deck rebuild in 1935. Therefore, the Navy placed Akagi in reserve at Sasebo Naval Arsenal on 15 November 1935. Over the next three years, workers tore out the two lower bow flight decks. They also removed the forward twin 20-cm gun turrets. Instead, builders extended the upper and middle hangars all the way to the bow. That built 8,600 square meters (93,000 square feet) of enclosed plane storage.
A 249.17-Meter Cypress Flight Deck and Three Plane Lifts
Above the enlarged hangars. Above them, Sasebo crews built a single full-length flight deck measuring 249.17 meters (817 feet 6 inches) long. It also measured 30.5 meters (100 feet) wide. Because excess top weight hurt stability. Thus, builders planked the steel deck frame with light Hinoki (Japanese cypress) wood over thin steel plates. Also, they removed the old curved hump so the new deck ran flat from bow to stern. It rested on tall steel girders at both ends.
To move planes quickly between the two main hangars and the flight deck. Thus, builders added a third midships lift measuring 11.8 by 13 meters. Working alongside the 12.8-by-16-meter bow lift and the 12.8-by-12.8-meter stern lift, this trio allowed crews. Thus, crews could spot a full strike wave in less than thirty minutes. In addition, workers fitted modern Kure Type 1 hydraulic arresting gear. It used nine cross-deck wires able to stop 6,000-kg planes at 60 knots.
Why Did IJN Akagi Have a Port-Side Island Bridge?
Among all fleet carriers in history, only Akagi and her smaller fleet consort Hiryū carried their island bridge on the port (left) side of the flight deck. During the 1935 design talks. At that time, navy officers noted that Akagi’s single huge downward-curving funnel vented hot boiler gas on the starboard side. Thus, placing the five-story bridge on the port side kept lookouts and gun directors clear of thick funnel smoke.
What is more, planners hoped that pairing a port-bridge carrier (Akagi) with a starboard-bridge carrier (Kaga) in the First Carrier Division would make air traffic safer. In theory, Akagi’s planes could fly left-hand landing circles while Kaga’s planes flew right-hand circles without crossing paths. In practice, however, the port bridge created bad wind eddies over the deck. It also clashed with a pilot’s reflex to bank left during a wave-off. Thus, Japan went back to starboard bridges on the Shōkaku and Taihō classes.
Speed Versus Protection: Engine Overhaul and Anti-Aircraft Limits
Deep inside the hull, Sasebo builders upgraded Akagi’s steam plant before she rejoined the fleet on 31 August 1938. First, they replaced her old coal-burning boilers with nineteen all-oil-fired Kampon water-tube boilers. Second, they merged the two starboard smoke stacks into a single huge downward-facing funnel with a water cooling spray. As a result, her four Gihon geared turbines raised power from 131,000 to 133,000 shaft hp. That gave the 41,300-ton ship a top speed of 31.5 knots.
Even more vital for Pacific war plans. Also, turning the old coal bunkers into oil tanks raised her fuel supply to 7,500 long tons of heavy fuel oil. Thanks to this huge fuel load, Akagi gained a cruising range of 10,000 sea miles at 16 knots. That long reach later allowed the flagship to cross the stormy North Pacific to Oahu. She could also raid deep into the Indian Ocean.
Outdated 12-cm Sponson Guns and 25-mm Type 96 Limits
Despite her high speed and range, the 1938 rebuild left Akagi with weak anti-aircraft defenses. While Kaga received modern 12.7-cm Type 89 dual-purpose guns during her refit, weight and budget rules forced Akagi. This kept her older six twin 12-cm (4.7-inch) 10th Year Type high-angle guns. Worse still, those heavy mounts sat low on hull sponsons below the flight deck. Thus, they could not fire across the opposite side against diving bombers.
For close-in defense, Sasebo added fourteen twin 25-mm Type 96 autocannon mounts (28 barrels) guided by six Type 95 directors. However, unlike the hard-hitting Allied Bofors 40mm anti-aircraft gun, the Japanese 25-mm gun used small 15-round box clips that needed slow hand reloading. As a result, its real firing rate reached only 110 rounds per minute,. Also, its light shells could not stop diving American SBD Dauntless bombers before they dropped their bombs.
IJN Akagi Technical File
Thus, these verified figures match her final Kure and Sasebo Naval Arsenal specification logs.
Name & KanjiFirst, Akagi (赤城 “Red Castle”)
Laid DownSecond, 6 Dec 1920 (Kure Arsenal)
Launched / Comm.Third, 22 Apr 1925 / 25 Mar 1927
Sasebo RebuildFourth, 24 Oct 1935 – 31 Aug 1938
Standard LoadAlso, 36,500 long tons (37,100 t)
Deep LoadAlso, 41,300 long tons (42,000 t)
Length OverallThen, 260.67 m (855 ft 3 in)
Flight DeckNext, 249.17 × 30.5 m (817.5 × 100 ft)
PropulsionThus, 4 × Gihon turbines, 19 boilers
Power / SpeedHence, 133,000 shp / 31.5 knots
Belt / Deck ArmorAt that time, 152 mm (6 in) / 79 mm (3.1 in)
Gun & AA BatteryLast, 6×20cm, 12×12cm AA, 28×25mm AA
Kido Butai Strike Wing
In fact, Akagi carried this elite air group for Operation AI (Pearl Harbor) and Operation MI (Midway).
Fighter SquadronFirst, 21–24 × A6M2 Zero (AI-1xx)
Dive Bomber WingSecond, 18 × Aichi D3A1 “Val” (AI-2xx)
Torpedo Bomber WingThird, 18–27 × Nakajima B5N2 “Kate” (AI-3xx)
Crated SparesFourth, 25 Reserve Airframes Below
Total CapacityThus, 91 Total Embarked Planes
Tail MarkingsAlso, Code “AI” + Single Red Band
Aviation GasAlso, 150,000 US gal (570,000 Liters)
Three Plane LiftsNext, 12.8×16m, 11.8×13m, 12.8×12.8m
Stop Wire SystemThen, Kure Type 1 (9 Cross Wires)
Air Wing LeaderIndeed, Commander Mitsuo Fuchida
Ship Crew SizeAt that time, 1,630 to 2,000 Officers & Men
Famous CaptainsLast, I. Yamamoto, R. Kusaka, K. Hasegawa, T. Aoki
4K Archival Colorization & Optical Frame Restoration
Surviving combat photos and film reels of IJN Akagi suffered decades of film shrinkage, salt-air fading, and rough copy grain. Thus, our team built a four-step 4K optical and paint-matching workflow. In fact, we use this same method in our Battleship Yamato Historical Colorized Restoration Dossier. This brings Pacific fleet combat back to life.
Instead of using guesswork color filters. Instead, our team matches exact Kure Naval Arsenal paint samples (Kure Grey) and natural Hinoki cypress wood planks. Also, we match the early-war Ame-iro amber-grey finish on Mitsubishi A6M2 Zeros. In addition, we match the dark green paint on Aichi D3A1 dive bombers. Use the preset buttons or drag the slider to compare the raw 1942 plate against our 4K color version.
01. Nitrate De-Scratch
First, frame alignment removes film scratches, lens dust, and camera shake from 1942 deck cameras.
02. Kure Paint Match
Second, color grading restores authentic Kure Grey steel, Hinoki wood planks, and red sun markings.
03. Tail-Code Clarity
Third, sharp detail recovery brings out AI-1xx and AI-2xx tail codes and deck tie-down rings.
04. 4K Depth Grading
Last, tone recovery brings out prop wash, wake foam, and bright Indian Ocean sky clouds.
Interactive Archive vs. 4K Color Comparison
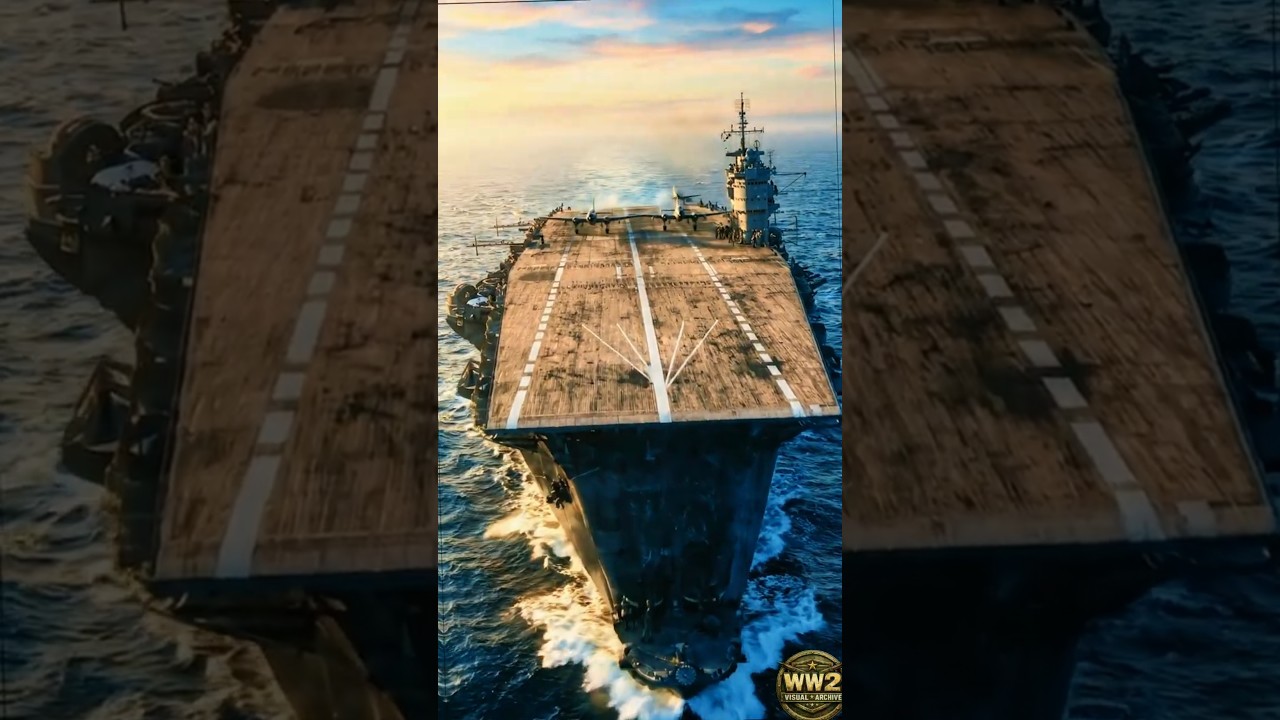 RAW 1942 ARCHIVE
4K COLORIZED
Thus, click any preset tab above or drag the slider across the image to compare.
Kido Butai Flight Deck Cinema & Strike Reel
Thus, click any division tab below to filter the eight 4K carrier clips, or click any card to watch inline.



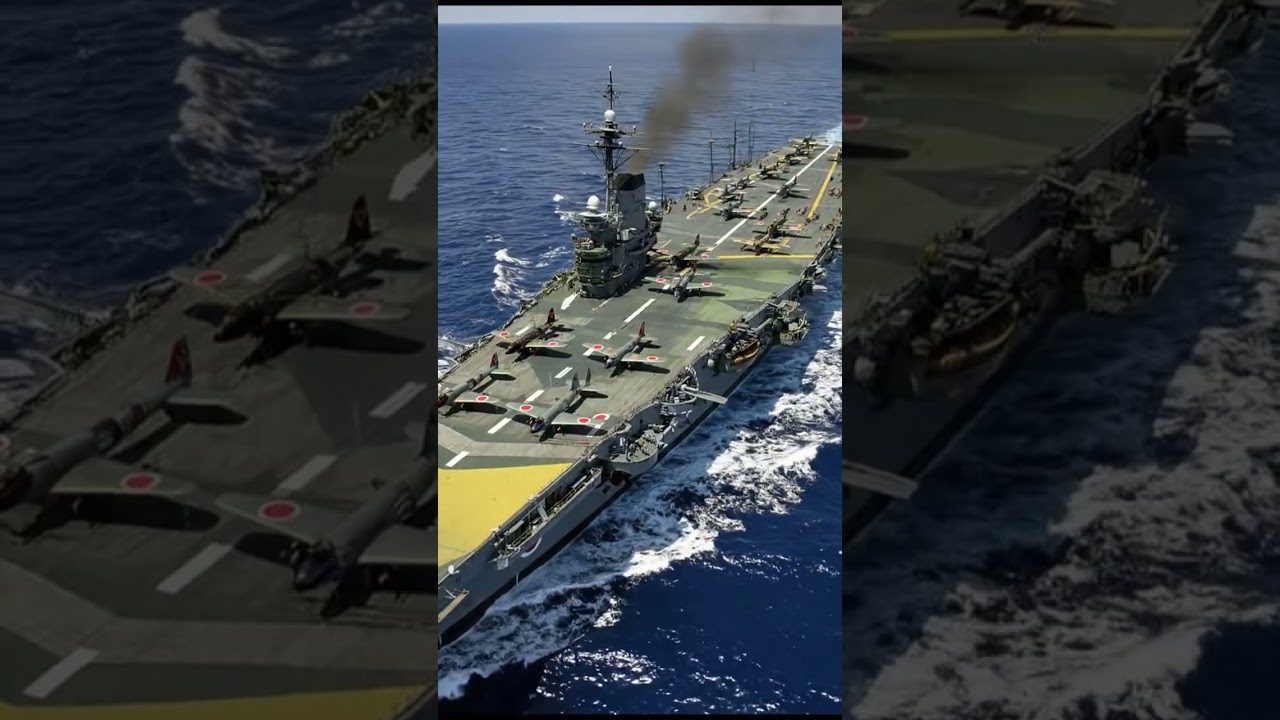

Massing the Sword: How IJN Akagi Shaped Carrier Strike Doctrine
After rejoining the First Carrier Division in December 1938, Akagi soon tested her full-length flight deck off south China. On 30 January 1939, she sailed with twelve Mitsubishi A5M “Claude” fighters, nineteen Aichi D1A “Susie” dive bombers,. She also carried thirty-five Yokosuka B4Y “Jean” attack planes. During February 1939, her planes bombed inland targets around Guilin and Liuzhou. Later, she supported combat in central China during spring 1940 before entering drydock for a late-1940 refit.
Air strikes over China taught Commander Minoru Genda and Admiral Isoroku Yamamoto a key lesson. Prior to 1941, the Navy had split its carriers into small units tied to battleship divisions. However, Genda saw that massing all fleet carriers inside one strike force would crush any enemy defense. Thus, on 10 April 1941, Japan formed the First Air Fleet (Dai-ichi Kōkū Kantai). Its strike arm became famous as the Kido Butai.
Uniting Six Fleet Carriers Under One Flagship Bridge
Under Vice Admiral Chūichi Nagumo and his chief of staff Rear Admiral Ryūnosuke Kusaka, Akagi served as the brain of this six-carrier fleet. First, the force paired Akagi and Kaga in the First Carrier Division. Second, it joined Hiryū and Sōryū in the Second Carrier Division. Third, it added the new sisters Shōkaku and Zuikaku in the Fifth Carrier Division. Together, those six decks carried over 400 modern planes—the strongest naval air force on earth.
Instead of launching one ship’s full air wing in a slow stream like contemporary American carriers, Japanese doctrine used joint “deckload strikes”. At first, all six carriers spotted every ready plane across their wood flight decks at the same time. Next, all six ships turned into the wind and launched their deckloads in just fifteen minutes. At that time, hangar crews raised the second wave on the three lifts to prepare a fast follow-up strike.
Box Formations, Radio Silence, and Radar-Less Air Defense
Even so, putting six fleet carriers inside one group worried cautious officers on the Naval General Staff. They feared that one lucky enemy air raid might sink Japan’s whole carrier force in a single hour. As a result, Japanese planners steamed in a loose box formation with roughly 7,000 meters (7,700 yards) between carrier pairs. Fast battleships, heavy cruisers, and screen destroyers ringed the carriers to add lookout posts and extra anti-aircraft guns.
Still, this defensive system suffered from two fatal blind spots. First, in 1941 and early 1942, Akagi carried no radar to spot incoming enemy bombers at long range. Second, the weak radios inside her Mitsubishi A6M2 Zero fighters crackled with static. Thus, pilots often ripped them out to save weight. Thus, fighter direction relied on visual lookouts, searchlight beams, and signal flags hoisted from Akagi’s port-side bridge.
Wings of the Red Castle: Inside Akagi’s Three-Plane Strike Triad
To hit targets across vast ocean ranges, Akagi relied on three superb carrier monoplanes introduced between 1939 and 1941. In fact, every plane assigned to the flagship wore the tail code “AI”. Each plane also wore a single red stripe around the rear fuselage. In contrast, her partner Kaga used the tail code “AII” and two red fuselage stripes. As a result, deck spotters and flight leaders could tell each ship’s planes apart in seconds.
First among this trio stood the nimble Mitsubishi A6M2 Type 0 Model 21 carrier fighter, designed by Jiro Horikoshi. Driven by a 950-hp Nakajima Sakae 12 radial engine, the Zero weighed only 1,680 kg empty. This resulted from secret light alloy wing spars. Armed with two 20-mm wing cannons and two 7.7-mm nose guns, Akagi’s twenty-one Zeros out-turned every Allied fighter in early 1942 while flying over 1,000 miles on internal fuel and drop tanks.
Pinpoint Dive Bombing: The Aichi D3A1 Type 99 “Val”
Second, for accurate dive bombing against moving ships and airfields, Akagi carried eighteen Aichi D3A1 Type 99 carrier bombers (“Val”). Based on German Heinkel He 70 low-wing monoplane lines. Furthermore, it used a 1,070-hp Mitsubishi Kinsei 43 engine, the D3A1 used fixed spatted landing gear. Also, slatted underwing dive brakes held the bomber steady in a steep 70-degree dive.
During a dive run, the D3A1 pilot centered the target in his sight. Then they dropped a 250-kg bomb from a swinging belly fork at 450 meters height. Also, two 60-kg bombs hung under the outer wings. Because Akagi’s dive-bomber crews trained hard against Zig-Zagging target ships off Kyushu. As a result, they scored an amazing 80-to-88 percent hit rate against Royal Navy ships in April 1942.
Shallow-Water Torpedo Mastery: The Nakajima B5N2 Type 97 “Kate”
Third, the heavy ship-sinking punch of Akagi’s air wing rested with her twenty-seven three-seat Nakajima B5N2 Type 97 attack bombers (“Kate”). Powered by a 1,000-hp Nakajima Sakae 11 engine with upward-folding wings, the B5N2 flew 60 mph faster than the American Douglas TBD Devastator. What is more, the B5N2 could either drop an 800-kg Type 91 torpedo right above the waves. It could also drop an 800-kg armor-piercing bomb from 3,000 meters.
Prior to late 1941, standard air-dropped torpedoes dived 70 to 100 feet deep upon hitting the sea. This meant they would stick in the mud of 40-foot-deep Pearl Harbor. However, navy builders fitted breakaway wood tail fins and gyro roll fins onto the Type 91 Mod 2 torpedo. Thus, when Akagi’s pilots dropped their torpedoes at 160 knots just 10 meters above the water, the weapons stayed above 35 feet and ran straight into Battleship Row.
Archival Photographic Plates: Pre-War Maneuvers & Hitokappu Bay (1941)
 SUMMER 1941 // US NAVY NH 73059
Plate 03: Flagship of the Kido Butai at Sea (Summer 1941)
Saved in official U.S. Naval History and Heritage Command photo NH 73059, Akagi steams at high speed during summer 1941 fleet drills. At that time, three Mitsubishi A6M2 Zero fighters sit parked ahead of her port-side bridge.
 NOVEMBER 1941 // HITOKAPPU BAY, KURILES
Plate 04: Six Carriers Assembled at Hitokappu Bay (Nov 1941)
Sailors muster on Akagi’s flight deck at Etorofu Island before sailing for Hawaii on 26 November 1941. Across the bay from left to right lie Kaga, Shōkaku, Zuikaku, Hiryū, and Sōryū.
Tora, Tora, Tora: From Hitokappu Bay to the Attack on Pearl Harbor
Throughout autumn 1941, while Akagi rode at anchor in Ariake Bay. At that time, Commander Mitsuo Fuchida led her aircrews through tough low-level torpedo runs over Kagoshima Bay. Because Kagoshima’s steep hills and shallow water closely matched Pearl Harbor, pilots practiced skimming over city roofs. Then they dropped down to 10 meters above the bay. On 22 November 1941, under Captain Kiichi Hasegawa with Vice Admiral Nagumo aboard, Akagi anchored in remote Hitokappu Bay on Etorofu Island.
Four days later, at 06:00. The fleet sailed on 26 November 1941. At once, all six fleet carriers, two fast battleships, three cruisers, and nine destroyers slipped into the misty North Pacific. To keep complete secrecy—much like the silent submarine patrols covered in our German U-Boats of WWII Dossier—Nagumo ordered strict radio silence. In fact, radio sailors removed transmitter fuses and sealed telegraph keys inside lead tubes. Meanwhile, shore stations in Kyushu sent fake traffic using Akagi’s call sign.
06:00 on 7 December 1941 — Launching the First Wave Against Oahu
At dawn on 7 December 1941 (Hawaii time), Akagi reached her launch spot 230 sea miles north of Oahu. Turning into a strong east-northeast wind. At that time, she pitched 12 degrees in rough seas. There, the flagship raised the famous “Z” battle flag flown by Admiral Tōgō at Tsushima in 1905. At once, green signal lamps swung down, and Fuchida led the first wave of 183 planes into the morning sky.
In that opening wave, Akagi launched twenty-seven Nakajima B5N2 “Kate” bombers and nine Mitsubishi A6M2 Zero fighters led by Lieutenant Commander Shigeru Itaya. First, fifteen of her B5Ns carried 800-kg armor-piercing bombs to drop from 3,000 meters onto moored battleships. Second, twelve B5Ns under Lieutenant Commander Shigeharu Murata carried shallow-running Type 91 torpedoes. At 07:53, Fuchida radioed the famous signal “Tora, Tora, Tora” back to Akagi’s bridge. This proved that the strike had caught Oahu by surprise.
Battleship Row Devastation and the Second Wave Launch
Skimming low across Southeast Loch, Murata’s twelve torpedo bombers from Akagi and twelve from Kaga. Together, they put torpedoes into the battleships USS Oklahoma, USS West Virginia, and USS California. At that time, high-level B5N bombers dropped 800-kg armor-piercing shells onto Battleship Row. That set off the forward magazine blast that sank USS Arizona. Above them, Itaya’s nine Akagi Zeros shot down defending planes and strafed parked aircraft across Hickam Field.
Less than an hour after the first launch, Akagi’s three lifts raised her second strike wave: eighteen Aichi D3A1 “Val” dive bombers under Lieutenant Takehiko Chihaya escorted by nine Zeros, including Petty Officer Sakae Mori in Zero AI-108. Diving through heavy flak at 09:00, Akagi’s dive bombers hit the battleships USS Maryland and USS Pennsylvania. They also hit the cruiser USS Raleigh, the destroyer USS Shaw, and the oiler USS Neosho. Across both waves, Akagi lost only one Zero and four dive bombers before steaming back to Japan.
Across Two Oceans: Rabaul, Darwin, Java, and the Indian Ocean Raid
After a brief refit at Kure in late December 1941, Akagi sailed south to Truk Lagoon. She steamed south in January 1942 with Kaga, Shōkaku, and Zuikaku. On 20 January, her air group bombed Rabaul on New Britain Island. Next day, her planes struck Kavieng on New Ireland to back Japanese troop landings. Soon after, on 19 February 1942, steaming 100 sea miles southeast of Timor, Akagi launched eighteen B5Ns, eighteen D3As, and nine Zeros in a huge 188-plane raid on Darwin, Australia.
That surprise attack sank eleven Allied ships inside Darwin Harbor—including the destroyer USS Peary—and it wrecked the port. Moreover, she struck without losing a single Akagi plane. Days later, steaming south of Java on 1 March 1942, Akagi’s dive bombers sank the American oiler USS Pecos and helped cripple the destroyer USS Edsall. Then, on 5 March, she launched eight B5Ns and nine Zeros. They struck in a heavy raid on Tjilatjap harbor that sealed the fall of Java.
Operation C: Sinking HMS Cornwall, Dorsetshire, and Hermes Off Ceylon
On 26 March 1942, with white canvas bundles of futon bedding lashed around her port-side bridge. This stopped bomb splinters, Akagi led five fleet carriers out of Staring Bay into the Indian Ocean. Their goal—Operation C—was to crush Admiral Sir James Somerville’s British Eastern Fleet and guard the sea lanes to Burma. On Easter Sunday, 5 April 1942, seventeen B5Ns and nine Zeros from Akagi bombed Colombo, Ceylon. At the same time, shooting down defending Royal Air Force Hurricanes and Fulmars.
That same afternoon, seventeen D3A dive bombers from Akagi joined squadrons from Hiryū and Sōryū. Together, they sank the British heavy cruisers HMS Cornwall and HMS Dorsetshire with 88 percent dive-bombing accuracy. Four days later, on 9 April, Akagi bombed Trincomalee. She also sent seventeen D3As that helped sink the British carrier HMS Hermes and the destroyer HMAS Vampire. Yet during that battle, nine British Blenheim bombers slipped past the CAP unseen. Then they dropped bombs from 11,000 feet that narrowly missed Akagi—showing Japan’s lack of radar before Midway.
Archival Photographic Plates: Pearl Harbor Zero Launch & Deck Tie-Down Grid
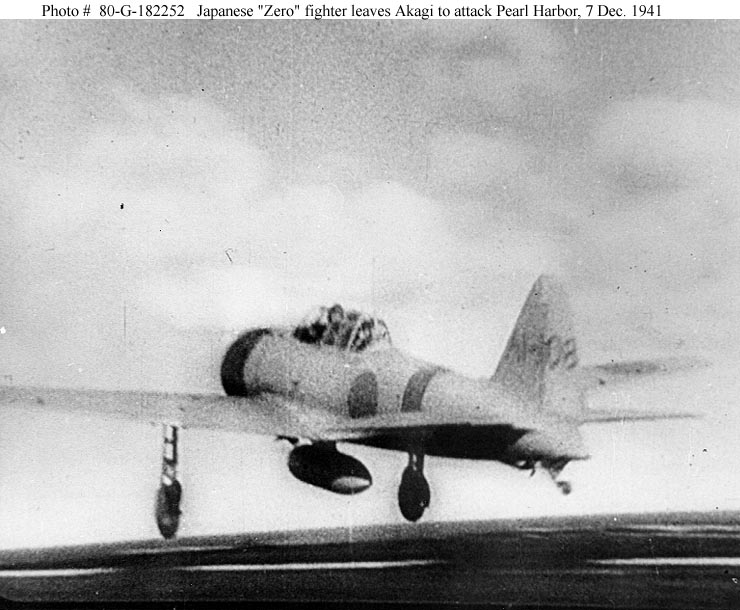 7 DEC 1941 // PEARL HARBOR SECOND WAVE
Plate 05: Zero AI-108 Launches for Oahu (7 Dec 1941)
Flown by Petty Officer 2nd Class Sakae Mori, a Mitsubishi A6M2 Zero fighter (tail code AI-108). Here, he lifts off Akagi’s bow during the second wave at Pearl Harbor. At that time, deck crews wave their caps along the port catwalk.
 NOV 1941 // ZERO AI-156 DECK GRID
Plate 06: Flight Deck Tie-Down Grid at Hitokappu Bay
Mitsubishi A6M2 Zero fighter AI-156 sits on Akagi’s wood deck at Hitokappu Bay prior to sailing for Hawaii. Notice the neat rows of dark recessed steel tie-down sockets set into the Hinoki cypress planks.
Major Operations Timeline
Thus, Akagi led nine major combat deployments across the Pacific and Indian Oceans.
Jan–Feb 1939First, South China (Guilin & Liuzhou Strikes)
Mar–Apr 1940Second, Central China Air Operations
7 Dec 1941Third, Attack on Pearl Harbor (Flagship)
20–22 Jan 1942Fourth, Invasion of Rabaul & Kavieng
19 Feb 1942Also, Bombing of Darwin, Australia
1–5 Mar 1942Also, Java Sea (USS Pecos, Edsall, Tjilatjap)
5 Apr 1942Next, Colombo Raid (Cornwall, Dorsetshire)
9 Apr 1942Then, Trincomalee (Hermes, Vampire)
4–5 Jun 1942Last, Battle of Midway (Scuttled 05:20)
Pacific & Atlantic Capital Ships
Likewise, compare Akagi’s carrier design and anti-aircraft battery against these restored WWII dossiers.
IJN Super-BattleshipFirst, IJN Yamato 4K Dossier
USN Fast EscortsSecond, USS Iowa-Class Battleships
Allied AA StandardThird, Bofors 40mm AA Gun
Atlantic RaiderFourth, Battleship Bismarck
Royal Navy PrideAlso, Battlecruiser HMS Hood
Undersea ThreatAlso, German U-Boats in WWII
Aircrew SurvivalLast, Luftwaffe M30 Drilling Rifle
The Fatal Morning at Midway: Inside Nagumo’s Dilemma Aboard Akagi
Stung by the April 1942 Doolittle Raid on Tokyo, Admiral Isoroku Yamamoto planned Operation MI. The plan aimed to seize Midway Atoll and trap the U.S. Pacific Fleet. On 25 May 1942, Akagi sortied from Hashirajima under Captain Taijiro Aoki. She flew Vice Admiral Nagumo’s flag ahead of Kaga, Hiryū, and Sōryū. Because Shōkaku and Zuikaku had suffered battle damage and pilot losses at Coral Sea earlier. In May, Nagumo sailed with four fleet carriers. On board Akagi rode twenty-four A6M2 Zeros, eighteen D3A1 Vals, and eighteen B5N2 Kates.
Unknown to Tokyo, American codebreakers at Station HYPO in Pearl Harbor had cracked the Japanese JN-25B naval code. As a result, Admiral Chester W. Nimitz placed three American carriers—USS Enterprise (CV-6), USS Hornet (CV-8), and USS Yorktown (CV-5)—in ambush northeast of Midway. At 04:45 on 4 June 1942, steaming 250 miles northwest of the atoll, Akagi launched eighteen D3A dive bombers and nine Zeros in a 108-plane raid on Midway. At that time, Nagumo held Akagi’s eighteen B5N2 bombers in the upper hangar armed with torpedoes to hit any American ships.
07:10 to 07:40 — The B-26 Bridge Near-Miss and the Double Weapon Swap
Starting at 07:10, land-based American planes from Midway made brave, piecemeal torpedo runs against the Japanese fleet. Although Akagi’s Combat Air Patrol Zeros shot down most of the six TBF Avengers and four USAAF B-26 Marauders. Even so, two hit B-26 bombers charged straight at the flagship. First, Lieutenant James Muri strafed Akagi’s deck, killing two men. Second, a burning B-26 missed Nagumo’s port-side bridge by mere yards before crashing into the sea.
Shaken by that close call and by Lieutenant Joichi Tomonaga’s 07:00 radio message asking for a second strike on Midway, Nagumo issued a fateful order at 07:15. He told deck crews on Akagi and Kaga to take the anti-ship torpedoes off the reserve B5N2 bombers and load 800-kg land bombs instead. However, at 07:40, Scout Plane No. 4 from the cruiser Tone spotted ten American ships to the northeast. At once, Nagumo reversed his order and told armorers to put the torpedoes back on Akagi’s B5Ns.
Why Hangar Weapon Handling Turned Akagi into a Floating Bomb
As historians Jonathan Parshall and Anthony Tully proved in Shattered Sword. In fact, this sudden weapon swap swamped Akagi’s hangar crews. Because weapon lifts and bomb carts were slow. Thus, tired sailors could not lower the heavy 800-kg land bombs and Type 91 torpedoes safely down into the armored magazines. Instead, crews stacked live high-explosive bombs and armed torpedoes along the hangar walls right beside fueled planes.
At that time, steady waves of American planes attacked between 07:55 and 09:40. In fact, Marine dive bombers, high-flying B-17E bombers, and carrier torpedo squadrons VT-8 and VT-6 forced Captain Aoki into hard 30-knot turns. Also, landing and fueling Combat Air Patrol Zeros kept the flight deck busy. Thus, at 10:20, Akagi had no strike planes spotted on deck when American dive bombers arrived overhead. However, her enclosed upper hangar was a live powder keg.
The Destruction of IJN Akagi at Midway — Minute-by-Minute
Thus, click any timestamp below to inspect Akagi’s hangar weapon state, CAP fighter launches, and damage log.
04:45 HRS (4 JUNE 1942) — DAWN STRIKE LAUNCHED AGAINST MIDWAY
At first, steaming 250 sea miles northwest of Midway, Akagi launches 18 Aichi D3A1 dive bombers and 9 A6M2 Zeros in a 108-plane raid. At that time, 18 B5N2 Kate bombers wait inside Akagi’s upper hangar armed with Type 91 anti-ship torpedoes.
First, Deck: LAUNCHING MIDWAY WAVE & CAP. Second, Hangar: 18 × B5N2 WITH TORPEDOES. Third, Speed: 30 KNOTS INTO SE WIND.
07:15 HRS — NAGUMO ORDERS RESERVE BOMBERS RE-ARMED
Second, after beating off Midway-based torpedo planes and getting Tomonaga’s 07:00 request for another strike, Nagumo orders crews on Akagi and Kaga to swap torpedoes for 800-kg land bombs. Yet at 07:40, after Tone’s No. 4 scout spots USN ships, he reverses the order.
First, Deck: CYCLING 11 AIRBORNE CAP ZEROS. Second, Hangar: LOOSE BOMBS & TORPEDOES STACKED. Third, Speed: 30-KNOT EVASIVE TURNS.
08:08–09:40 HRS — HIGH-ALTITUDE B-17 EVASION & TORPEDO DEFENSE
Third, filmed from 20,000 feet by USAAF B-17E bombers (USAF-57576), Captain Aoki turns Akagi clear of falling bombs. At the same time, he launched CAP Zeros at 08:08 and 08:32. Between 08:37 and 09:00, Akagi lands her Midway strike wave just before stopping VT-8 and VT-6 torpedo planes.
First, Deck: LANDING WAVE & REFUELING CAP. Second, Hangar: LIVE WEAPONS UNSTRUCK BELOW. Third, Speed: HARD-OVER EVASIVE TURNS.
10:26 HRS (4 JUNE 1942) — RICHARD BEST’S 1,000-LB BOMB DETONATES
Fourth, seeing McClusky’s VS-6 squadron crush Kaga, Lt. Cdr. Richard Best leads his three-plane VB-6 flight (with Edwin Kroeger and Frederick Weber) onto Akagi. As a result, Best’s 1,000-lb bomb pierces the aft rim of the midships lift and blows up inside the upper hangar among fueled B5Ns and loose bombs.
First, Deck: PIERCED AT MIDSHIPS LIFT. Second, Hangar: CHAIN BLAST IN HANGAR. Third, Steering: RUDDER JAMMED 30° STBD (10:40).
10:46–13:50 HRS — NAGUMO LEAVES BY ROPE & ENGINES STOP
Next, with aviation fuel fires roaring through the flight deck and CO2 gas failing, Vice Admiral Nagumo and Rear Admiral Kusaka climb out the bridge windows by rope at 10:46 to board cruiser Nagara. At that time, toxic smoke floods the boiler rooms, killing 115 builders and stopping Akagi at 13:50.
First, Deck: SWEPT BY GASOLINE FLAMES. Second, Hangar: TORPEDO & BOMB BLASTS. Third, Engines: DEAD IN WATER AT 13:50 HRS.
04:50–05:20 HRS (5 JUNE 1942) — YAMAMOTO ORDERS AKAGI SCUTTLED
At last, after the hull burned for 19 hours, Capt. Kosaku Ariga ordered Capt. Taijiro Aoki untied from the bow capstan. Then, at 04:50, Admiral Yamamoto ordered his old ship scuttled. Thus, destroyers Arashi, Hagikaze, Maikaze, and Nowaki each fired one Type 93 torpedo into Akagi. As a result, she sank bow-first at 05:20.
First, Deck: BOW SINKS AT 05:20 HRS. Second, Torpedoes: 4 × TYPE 93 LONG LANCE HITS. Third, Wreck: UPRIGHT AT 5,490 M DEPTH.
Archival Photographic Plate: Final Combat Maneuver at Midway (4 June 1942)
 4 JUNE 1942 (08:08 HRS) // BATTLE OF MIDWAY ARCHIVAL PHOTO USAF-57576
Plate 07: Final Combat Photograph Under B-17 Attack (08:08 Hrs, 4 June 1942)
Taken from 20,000 feet by an attacking U.S. Army Air Forces B-17E Flying Fortress, Akagi (right, partly under thin clouds) and her plane-guard destroyer Nowaki (left) carve white wakes across the Pacific two hours before the fatal dive-bomber strike. Notice that her flight deck is empty and her bow lift is lowered after launching three CAP Zeros at 08:08.
Dick Best’s Single Bomb and the Scuttling of the Flagship
At 10:20 on 4 June 1942. At the same time, Japanese Combat Air Patrol Zeros skimmed the waves shooting down low-flying American TBD Devastator torpedo planes, thirty-one Douglas SBD Dauntless dive bombers from USS Enterprise arrived overhead at 19,000 feet. First, at first, due to a mix-up in American strike rules, both Lieutenant Commander C. Wade McClusky’s VS-6 squadron and Lieutenant Commander Richard Halsey Best’s VB-6 squadron tipped into dives against Kaga. Yet Best saw at once that Kaga was already doomed while nearby Akagi steamed untouched.
Thus, Best signaled his main flights to pull up, and he led his two wingmen—Ensign Edwin J. Kroeger and Ensign Frederick T. Weber—into a steep 70-degree dive on Akagi. At 10:26, just as a refueled Zero fighter lifted off Akagi’s bow, the three American dive bombers dropped their 1,000-pound (454-kg) bombs. First, Kroeger’s bomb hit the water 5 to 10 meters off the port beam beside the island. The blast drenched the bridge with spray.
Direct Impact at the Midships Lift and Jammed Steering
Seconds later, Weber’s bomb narrowly missed the port stern quarter and blew up underwater right beside the rudder. Finally, Richard Best’s single 1,000-pound bomb punched straight through the aft rim of the midships plane lift. The heavy steel lift platform folded downward into the shaft, and the bomb blew up inside the closed upper hangar. Inside sat fueled B5N2 bombers and loose 800-kg bombs.
Although Akagi took only one direct bomb hit, that single blast inside her packed hangar proved fatal. Hot steel fragments tore open fuel lines. That set off chain blasts among the stacked bombs and Type 91 torpedo warheads. At 10:29, Captain Aoki ordered the munitions rooms flooded. While the bow rooms flooded quickly, shock damage from Weber’s near-miss astern jammed the aft flood valves. It also knocked out the main fire pump.
Bridge Evacuation, Engineering Suffocation, and Scuttling at Dawn
At 10:32, crews fired the upper hangar’s one-shot carbon dioxide (CO2) fire system. Yet roaring gas flames and exploding torpedoes blew out the hangar walls. By 10:40, steering failed with the rudder jammed 30 degrees to starboard, locking the ship into a wide circle. Six minutes later, at 10:46, thick smoke forced Vice Admiral Nagumo and Rear Admiral Kusaka to climb out the front bridge windows down a rope before boarding the cruiser Nagara.
Below decks, toxic smoke poured through air ducts into the boiler and engine rooms. That blow killed 115 of Akagi’s 303 builders and stopping all four shafts at 13:50. That night, Captain Aoki tied himself to an anchor capstan on the bow to go down with his ship. At last, Captain Kosaku Ariga (later last captain of battleship Yamato) ordered him untied. At last, at 04:50 on 5 June, Admiral Yamamoto ordered his old ship sunk. Destroyers Arashi, Hagikaze, Maikaze, and Nowaki each fired one Type 93 torpedo into Akagi. That strike sank her bow-first at 05:20 with 267 men.
Why Japanese Carriers Burned: Structural Forensics & Damage Control
Why did a single 1,000-pound bomb doom the 41,300-ton Akagi at Midway. In contrast, the American carrier USS Yorktown (CV-5) survived three bomb hits and two aerial torpedoes for two days? Naval builders point to four major design gaps between Imperial Japanese Navy carriers and their American or British rivals.
First, Japanese shipwrights built Akagi’s two main hangars as fully closed steel boxes welded into the hull frame to hold up the flight deck above. In contrast, American Yorktown– and Essex-class carriers used an “open hangar” design with wide roller shutters along the hull sides. As a result, American sailors could push burning planes or live bombs straight over the side into the sea, and bomb blasts vented harmlessly into the open air.
Structural Aviation Fuel Tanks and Hangar Servicing Doctrine
Second, aboard Akagi, yard workers built the 150,000-gallon aviation gas tanks right into the hull frame. They did not hang separate saddle tanks surrounded by water or void spaces. Thus, when bomb shockwaves flexed Akagi’s hull girders, riveted tank seams split open. They then leaked explosive gas fumes across the lower decks. Also, Japanese rules required crews to fuel and arm planes inside the closed hangars instead of on the open flight deck.
Third, Akagi lacked separate fire-main loops, backup diesel water pumps, and heavy asbestos fire curtains; once her aft pump failed at 10:29, crews had no water pressure to fight hangar fires. Fourth, unlike the U.S. Navy—which trained every sailor aboard ship in firefighting—Japan limited damage control to small repair teams, many of whom died. Toxic smoke soon entered Akagi’s air vents. Later, these harsh lessons led Japan to pour concrete around fuel tanks and fit armored flight decks on Taihō and Shinano, while the U.S. Navy ringed its carriers with fast Iowa-class battleships armed with Bofors 40mm guns.
Three Miles Beneath the Pacific: The 2019 & 2023 Deep-Sea Wreck Surveys
To hide the scale of the Midway loss from the public, Tokyo kept Akagi on the official navy list as an “unmanned ship” until 25 September 1942. For the next seventy-seven years, the exact resting place of Nagumo’s flagship stayed hidden under more than three miles of water inside the Papahānaumokuākea Marine National Monument. Earlier teams found small hull pieces from Kaga in 1999. Yet the main hulls of the four Japanese carriers eluded searchers.
Then, on 20 October 2019—just two days after finding Kaga—undersea director Rob Kraft and navy historian Frank Thompson aboard Paul Allen’s research ship RV Petrel located Akagi. Using a deep-sea drone fitted with side-scan sonar. Working at a depth of 5,490 meters (18,011 feet) roughly 1,300 miles northwest of Pearl Harbor, the team mapped her 260-meter hull sitting upright on the seabed.
September 2023 EV Nautilus Visual Dive: Imperial Crest and Casemate Guns
Later, in September 2023, Ocean Exploration Trust scientists aboard EV Nautilus joined Japanese and American historians to run the first visual robot dive on Akagi in eighty-one years. During a fourteen-hour non-invasive survey at 5,490 meters, sharp cameras glided along her bow, stern, and torn flight deck.
In fact, the deep-sea video backed up every detail of the 1942 battle logs. At the bow, the carved gold wood imperial flower crest (Kikumon) still clung above the stem where Captain Aoki had tied himself to the capstan. Along the stern quarters, her six 20-cm casemate guns still pointed outward. At the same time, her upper hangar walls and flight deck steel lay peeled back. Huge internal bomb blasts caused that damage, set off by Richard Best’s hit.
Eyes and Signals of the Flagship: Fire-Control Optics and Deck Landing Aids
Because Akagi served as fleet flagship, Sasebo builders packed her narrow port-side bridge and hull sponsons with the best optical rangefinders in Japan. First, two Type 91 high-angle fire-control directors guided her six twin 12-cm sponson guns against high-flying targets. Second, six compact Type 95 directors controlled her fourteen twin 25-mm autocannon mounts. Each director used a 2-meter or 4.5-meter stereo rangefinder manned by spotters with sharp binoculars.
However, because Akagi had no fire-control radar in June 1942, these optical directors suffered when smoke or low clouds hid diving planes. Also, when the ship heeled hard at 30 knots. During hard turns, salt spray and funnel smoke drifted across the open sights. As a result, gun crews often had to aim by eye using tracer rounds. This proved far too slow against 250-knot dive bombers.
Japanese Optical Landing Lights Versus US Navy Landing Signal Officers
While the U.S. Navy used a human Landing Signal Officer (LSO) waving colored paddles. In contrast, Akagi used an optical light landing aid invented by Japanese naval flyers in the early 1930s. Along the port and starboard edges of the flight deck, yard workers mounted rows of colored reference lamps at two different heights.
When an approaching Zero or Kate pilot lined up a closer green lamp evenly with a farther red lamp, he knew his glide slope was exact at 4 to 5 degrees. If the plane sank too low toward the stern ramp, the red lamp rose above the green lamp, warning the pilot to add throttle at once. In fact, this clever optical light system prefigured the mirror landing sights adopted by Western navies after World War II.
Inside the Floating City: Daily Routine of Akagi’s 2,000 Officers and Sailors
During wartime cruises in 1941 and 1942, nearly 2,000 officers, pilots, mechanics, builders, and seamen lived inside Akagi’s deep hull. Because the two huge enclosed hangars filled the middle of the ship, crew berthing sat cramped along the outboard side passages and on the lower decks right above the hot boiler rooms. In the tropics off Java and Ceylon, temperatures inside those uncooled lower berths often topped 38 degrees Celsius (100 degrees Fahrenheit).
Even so, Akagi was famous across the Combined Fleet for her fine galleys and high morale. Before sailing from Hitokappu Bay. The fleet sailed on 26 November 1941, supply boats loaded crates of fresh apples, pickled radish, sweet bean cakes, rice, and barrels of sake onto her lower store rooms. On the night of 6 December 1941, mechanics and pilots shared a傳統 ceremonial toast before the dawn launch against Oahu.
Round-the-Clock Hangar Maintenance and Engine Run-Ups
For the 400 aviation mechanics aboard Akagi, work rarely stopped after sunset. Once the final plane landed. Then they dropped down the hydraulic lifts, heavy steel rollup doors closed the hangar bays so light would not leak out at night. Inside the brightly lit steel boxes, crews changed spark plugs. They tuned Nakajima Sakae radial engines, patched bullet holes in fabric control surfaces, and loaded belts of 20-mm cannon shells.
Because Akagi had no open side bays to vent exhaust smoke, mechanics could not run aircraft engines at full power inside the hangars for long. Thus, before dawn, elevator crews lifted each plane up to the open cypress flight deck in batches. There, wrapped in fur-lined flight suits against the freezing North Pacific wind, mechanics warmed up thirty radial engines at once. Meanwhile, blue exhaust flames lit the dark deck.
Treaty Giants Compared: How Akagi Measured Up Against USS Lexington
How did Akagi compare against the other fast battlecruiser-to-carrier conversions built under Article IX of the Washington Naval Treaty? In the United States. Thus, builders converted two unfinished 43,500-ton battlecruiser hulls into USS Lexington (CV-2) and USS Saratoga (CV-3). At that time, the Royal Navy converted the light battlecruisers HMS Courageous, HMS Glorious, and HMS Furious into fast fleet carriers.
In terms of sheer size and engine power, the American Lexington class outmatched Akagi in several areas. For example, Lexington’s turbo-electric drive generated 180,000 shaft hp. That power gave a top speed of 33.2 knots across a 268.2-meter flight deck. In addition, Lexington’s huge single hangar and deck-park doctrine allowed her. Thus, she could operate up to 78 planes at Coral Sea.
Strike Range and Torpedo Punch Versus American Toughness
However, during 1941 and early 1942, Akagi held a decisive edge over both American and British carriers in the quality and range of her embarked aircraft. Whereas Akagi’s A6M2 Zeros, D3A1 Vals, and B5N2 Kates could strike targets 250 to 300 sea miles away, Lexington’s early F4F Wildcats and TBD Devastators had barely half that combat radius. Also, Japan’s Type 91 aerial torpedo ran faster, deeper, and far more reliably than the flawed American Mark 13 torpedo.
On the other hand, Lexington and Saratoga proved far tougher under fire thanks to better compartmentation and damage control. Even though both Akagi and Lexington were lost to internal aviation gas blasts. Those blasts happened in May and June 1942. Saratoga survived multiple submarine torpedo hits and kamikaze crashes to outlast the entire war.
Captains of the Red Castle: From Isoroku Yamamoto to Taijiro Aoki
Across her fifteen-year career from 1927 to 1942, command of Akagi served as the premier stepping stone to flag rank in the Imperial Japanese Navy. Her first commanding officer, Captain Ryōtarō Umene, oversaw her fitting out at Kure in 1925 and her triple-deck commissioning in March 1927. Soon after, on 10 December 1928, Captain Isoroku Yamamoto took command of the carrier for eleven months. There he gained the hands-on flight deck knowledge that later shaped his Pearl Harbor strategy.
During the 1930s, a string of future admirals walked her bridge. For instance, Captain Eiji Gotō commanded her in 1930. Next came Captain Kōichi Shiozawa in 1931 and CaptainNishizō Tsukahara in 1933. Later, Captain Ryūnosuke Kusaka—who became Nagumo’s chief of staff—commanded Akagi from 1936 to 1937 during her Sasebo rebuild.
Wartime Captains and Elite Air Group Commanders
When war broke out in the Pacific, Captain Kiichi Hasegawa conned Akagi through the Hitokappu Bay assembly, the Pearl Harbor attack, Rabaul, Darwin, and the Indian Ocean Raid. Later, on 25 April 1942, veteran flyer Captain Taijiro Aoki took command just five weeks before the Battle of Midway. After surviving the scuttling of his ship, Aoki served ashore as a naval flight instructor for the rest of the war.
On the flight deck, Akagi’s air group boasted the finest strike leaders in Japan. Commander Mitsuo Fuchida led the entire First Air Fleet strike aloft at Pearl Harbor, Darwin, and Ceylon. However, an appendix surgery kept him in his cabin during Midway. Under him served fighter ace Lieutenant Commander Shigeru Itaya, torpedo master Lieutenant Commander Shigeharu Murata, and dive-bomber leader Lieutenant Takehiko Chihaya—men whose skill made Akagi the terror of the Pacific for six unforgettable months.
Casualties & Damage Log
Thus, these figures come from Captain Aoki’s official Midway action report and Parshall & Tully’s audit.
Attacking SquadronFirst, VB-6 (USS Enterprise) — 3 SBDs
Strike LeaderSecond, Lt. Cdr. Richard Halsey Best
Two WingmenThird, Ens. E. Kroeger & Ens. F. Weber
Direct Bomb HitsFourth, 1 × 1,000-lb (454 kg) Mk 13 Bomb
Impact LocationAlso, Aft rim of midships plane lift
Two Near MissesAlso, Port island beam & port stern
Scuttling ShipsNext, Arashi, Hagikaze, Maikaze, Nowaki
Total Crew KilledLast, 267 KIA (115 Engineers, 7 Pilots)
Wreck Survey (2019 & 2023)
In addition, deep-sea sonar and ROV dives verified Akagi’s resting place on the Pacific floor.
Sonar DiscoveryFirst, 20 October 2019 (RV Petrel)
First Visual DiveSecond, September 2023 (EV Nautilus)
CoordinatesThird, 30°30′N 178°40′W (Midway Abyss)
Ocean DepthFourth, 5,490 meters (18,011 feet)
Hull OrientationAlso, Upright on keel, bow intact
Bow FeaturesAlso, Imperial Chrysanthemum Crest
Stern ArmamentNext, 20 cm Casemate Guns Intact
Aircrew GearLast, WWII Aircrew Survival Dossier
Explore Related 4K Naval & Ordnance Dossiers
Thus, you can continue your historical research across our restored 4K dossiers covering Axis and Allied capital ships, submarine warfare, naval anti-aircraft guns, and aircrew weapons.
01. Battleship Yamato — Historical 4K Colorized Restoration
First, inspect the 72,800-ton Combined Fleet flagship whose sister hull Shinano became an armored carrier after Akagi’s loss at Midway.
02. USS Iowa-Class Fast Battleships Technical Dossier
Second, see how 33-knot Iowa-class fast battleships escorted American carrier task forces and provided dense anti-aircraft screens.
03. Bofors 40mm Anti-Aircraft Gun — The Kamikaze Stopper
Third, compare the Allied 40mm Bofors autocannon directly against the 25mm Type 96 mounts that failed to protect Akagi at Midway.
04. Kriegsmarine Battleship Bismarck — Operational File
Fourth, examine how carrier-borne Fairey Swordfish biplanes from HMS Ark Royal jammed Bismarck’s steering gear, much like Akagi’s rudder failure.
05. HMS Hood — Pride of the Royal Navy Battlecruiser Force
Also, explore the 42,000-ton British battlecruiser that shaped post-Jutland capital ships before the Washington Treaty converted Akagi.
06. German U-Boats in WWII — Wolfpack Engineering
Also, study Axis submarine tactics alongside the undersea threat that sank Japanese carriers Shōkaku, Taihō, Shinano, and Unryū.
07. German M30 Luftwaffe Drilling Triple-Barrel Rifle
Last, inspect the Sauer & Sohn M30 three-barrel aircrew survival weapon issued to WWII pilots flying over remote combat theaters.
Primary Archival Resources & Bibliography
In fact, all technical metrics, combat timestamps, and public-domain photos in this dossier come from official naval archives and peer-reviewed books.
Official Naval Repositories & Published Scholarship
01. U.S. Naval History and Heritage Command (NHHC)
First, official U.S. Navy archival plates include Photo NH 73059, NARA 80-G-182252, and USAF-57576 in the NHHC Battle of Midway Archive.
02. Kure Maritime Museum & Shizuo Fukui Archive
Second, Kure Naval Arsenal records and photo plates edited by Kazushige Todaka document April 1942 Indian Ocean Plate P24 and 1934 Osaka Bay Plate P20.
03. Parshall & Tully — Shattered Sword (2005)
Third, Shattered Sword: The Untold Story of the Battle of Midway (Potomac Books, ISBN 1-57488-923-0) and the IJN Akagi Tabular Record provide hangar weapon and CAP logs.
04. Peattie & Lengerer — IJN Carrier Architecture
Fourth, Mark R. Peattie’s Sunburst: The Rise of Japanese Naval Air Power 1909–1941 (Naval Institute Press) and Hans Lengerer’s Warship VI essays detail the 1927 triple deck and 1938 Sasebo rebuild.
05. RV Petrel (2019) & EV Nautilus (2023) Surveys
Also, Vulcan Inc. side-scan sonar logs (20 October 2019) and Ocean Exploration Trust ROV video (September 2023) verify Akagi’s wreck at 5,490 meters depth.
06. Wikimedia Commons Public Domain Media Repository
Last, full-resolution public-domain plates under Japanese Copyright Act Article 23 and U.S. federal law reside in Category: Akagi (ship, 1927).